Kia Optima Hybrid: Driveshaft Assembly / Front Driveshaft Repair procedures
| Replacement |
| 1. |
Loosen the wheel nuts slightly.
Raise the vehicle, and make sure it is securely supported. |
| 2. |
Remove wheel nuts, front wheel and tire from front hub.
|


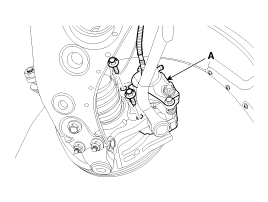
| 3. |
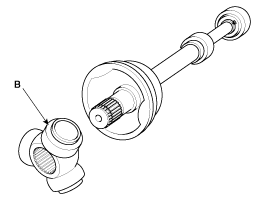
Remove the brake caliper mounting bolts , and then hold the brake caliper assembly (A) with wire.
|
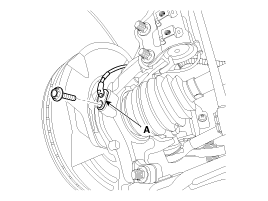
| 4. |
Remove driveshaft nut (A) from the front hub when applying the brake.
|

| 5. |
Remove the tie rod end ball joint (A) from the knuckle.
|
| 6. |
Loosen the mount bolt and then remove the wheel speed sensor (A) from knuckle.
|
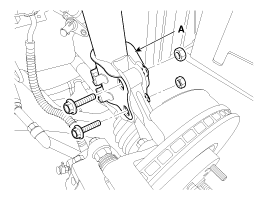
| 7. |
Loosen the bolt & nut and then remove the knuckle from the strut assembly (A).
|
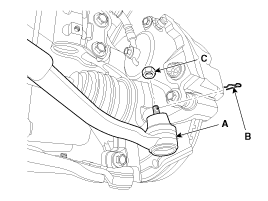
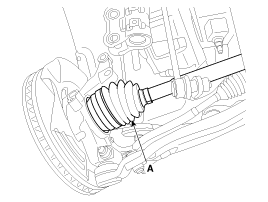
| 8. |
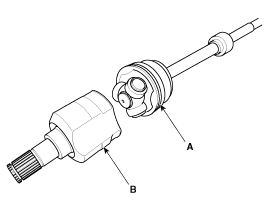
Disconnect the driveshaft (A) from the front hub assembly.
|
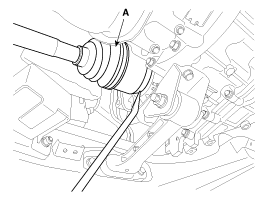
| 9. |
Insert a pry bar between the transaxle case and joint case, and separate the driveshaft (A) from the transaxle case.
|
| 10. |
Install in the reverse order of removal. |
| Inspection |
| 1. |
Check the driveshaft boots for damage and deterioration. |
| 2. |
Check the driveshaft spline for wear or damage. |
| 3. |
Check that there is no water or foreign material in the joint. |
| 4. |
Check the spider assembly for roller rotation, wear or corrosion. |
| 5. |
Check the groove inside the joint case for wear or corrosion. |
| 6. |
Check the dynamic damper for damage or cracks. |
| Disassembly |
|
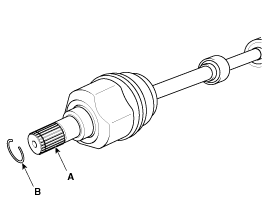
| 1. |
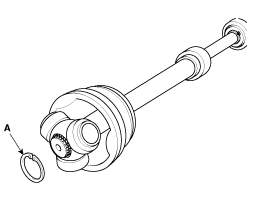
Remove the circlip (B) from the driveshaft spline (A).
|
| 2. |
Remove both boot bands from the transaxle side joint(TJ) case.
|

| 3. |
Pull out the boot from transaxle side joint case (B). |
| 4. |
While dividing joint(TJ) boot (A) of the transaxle side, wipe the grease in TJ case (B) and collect them respectively.
|
| 5. |
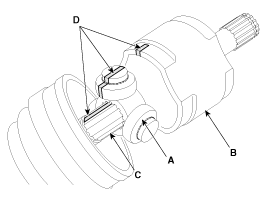
Remove the snap ring (A) from the shaft.
|
| 6. |
Remove the spider assembly (B) from the driveshaft.
|
| 7. |
Clean the spider assembly. |
| 8. |
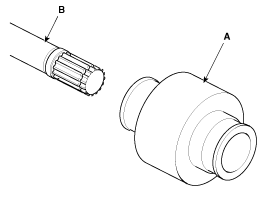
Remove the boot (A) of the transaxle side joint(TJ).
|
| 9. |
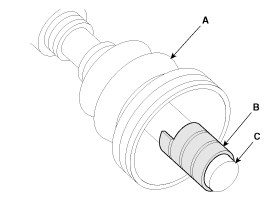
Using a plier or flat-tipped (-) screwdriver, remove the both side of clamp (B) of the dynamic damper (A).
|
| 10. |
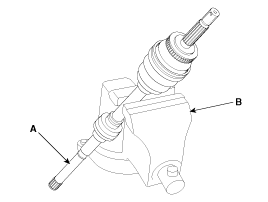
Fix the driveshaft (A) with a vice (B) as illustrated.
|
| 11. |
Apply soap powder on the shaft to prevent being damaged
between the shaft spline and the dynamic damper when the dynamic damper
is removed. |
| 12. |
Saperate the dynamic damper (A) from the shaft (B) carefully.
|
| 13. |
Using a plier or flat-tipped (-) screwdriver, remove the BJ boot band on the side of wheel.
|
| 14. |
Pull out the joint (BJ) on the side of wheel into transaxle direction.
|
| Reassembly |
| 1. |
Wrap tape around the driveshaft spline(TJ) to prevent damage to the boots. |
| 2. |
Apply grease to the joint boot on the side of the wheel and install the boot.
|
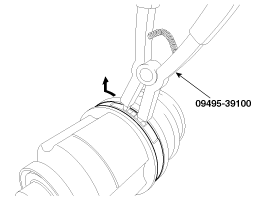
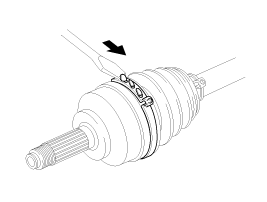
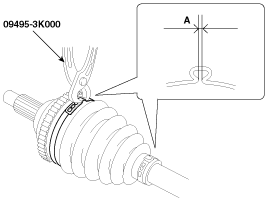
| 3. |
Using the SST (09495-3K000), secure the boot band.
|
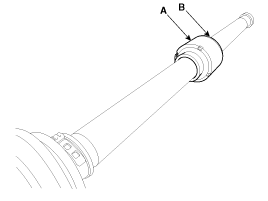
| 4. |
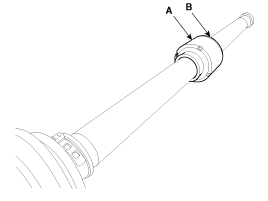
To install the dynamic damper (A), keep the shaft in a straight line and assemble the dynamic damper with the bands(B).
|
| 5. |
Assemble the transaxle side joint boot and bands. |
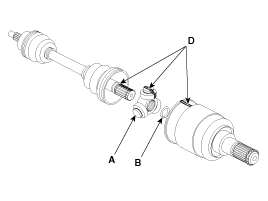
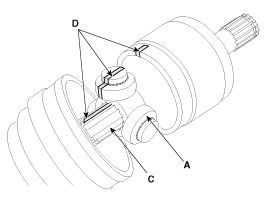
| 6. |
Using the alignment marks (D) made during disassembly as a
guide, install the spider assembly (A) and snap ring (B) on the
driveshaft splines (C).
|
| 7. |
Add specified grease to the joint boot as much as it was wiped away at inspection. |
| 8. |
Install the both boot band. |
 Front Driveshaft Components and Components Location
Component location 1. Driveshaft (LH) 2. Driveshaft (RH) Components 1. BJ assembly2. Circlip3. BJ boot band4. BJ boot5. Dynamic damper band6. Dynamic damper7. Shaft8. TJ boot band9. TJ boot10. Spider assembly11. ...

Other information:
Kia Optima Hybrid (TF HEV) 2016-2020 Service Manual: Smart key unit Components and Components Location
Component (1) Connector Pin Information No.Connector A (26pin)Connector B (16pin)Connector C (22pin)1V_BAT loadC_CAN lowSSB illumination ground2-C_CAN highImmobilzer indicator3Power ground1--4IGN1Stop lamp fuseInterior antenna #2 power5IGN1 relayBrake switchInterior antenna #1 power6ACCImmobilizer antenna ...
Kia Optima Hybrid (TF HEV) 2016-2020 Service Manual: Multimedia jack Description and Operation
Description The multimedia jack on the console upper cover is for customers who like to listen to external portable music players like the MP3, iPod and etc., through the vehicle''s sound system when it is linked to this jack. The customer has this added option. In case of distortions from media connected ...