Kia Optima Hybrid: Lighting System / Troubleshooting
Kia Optima Hybrid (TF HEV) 2016-2020 Service Manual / Body Electrical System / Lighting System / Troubleshooting
| Troubleshooting |
| 1. |
The lamp switch inputs can be checked using the GDS. |
| 2. |
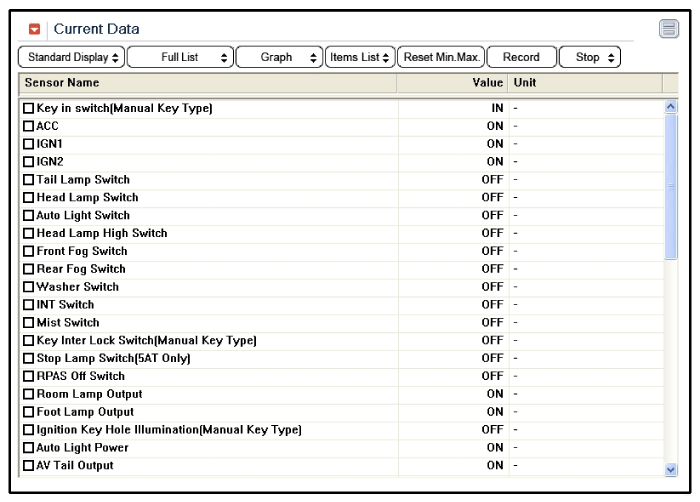
To check the input value of lamp switch, select option "Body Control Module". |
| 3. |
To consult the present input/output value of BCM, "Current
DATA". It provides information of BCM input/output conditions of power
supply, turn signal/brake lamp, headlamp, door, locks, outside mirror,
wiper, auto-light and transmitters etc.
|
| 4. |
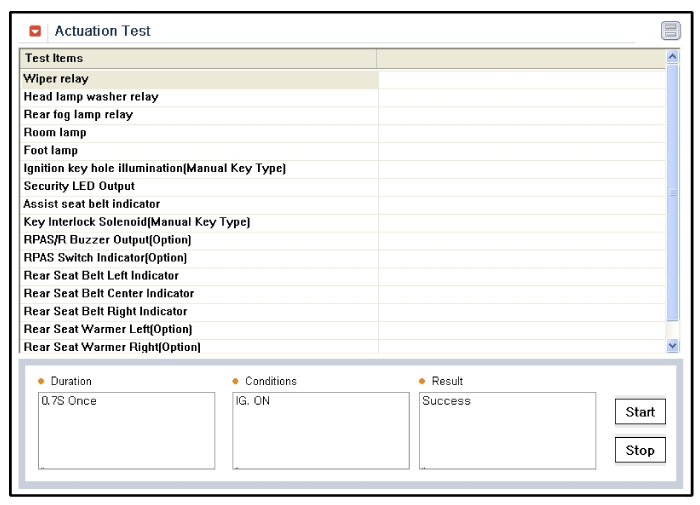
To check the input value of lamp switch in force mode, select option "Actuation Test".
|
| Symptom | Possible cause | Remedy |
| One lamp does not light (all exterior) | Bulb burned out | Replace bulb |
| Socket, wiring or ground faulty | Repair if necessary | |
| Stop lamps do not light | Bulb burned out | Replace bulb |
| Stop lamp fuse (15A) blown | Check for short and replace fuse | |
| Stop lamp switch faulty | Adjust or replace switch | |
| Wiring or ground faulty | Repair if necessary | |
| Stop lamps do not turn off | Stop lamp switch faulty | Repair or replace switch |
| Instrument lamps do not light (Tail lamps light) | Rheostat faulty | Check rheostat |
| Wiring or ground faulty | Repair if necessary | |
| Back up lamps do not light | Bulb burned out | Replace bulb |
| Back up lamp fuse (10A) blown | Check for short and replace fuse | |
| Back up lamp switch (M/T) faulty | Check switch | |
| Transaxle range switch (A/T) faulty | Check switch | |
| Wiring or ground faulty | Repair if necessary | |
| Map lamp does not light | Bulb burned out | Replace bulb |
| Room lamp fuse (10A) blown | Check for short and replace fuse | |
| Map lamp switch faulty | Check switch | |
| Wiring or ground faulty | Repair if necessary | |
| Luggage room lamp does not light | Bulb burned out | Replace bulb |
| Trunk lamp fuse (10A) blown | Check for short and replace fuse | |
| Luggage room lamp switch faulty | Check switch | |
| Wiring or ground faulty | Repair if necessary |
 Turn Signal Lamp Repair procedures
Removal Door Mirror Turn Signal Lamp 1. Disconnect the negative (-) battery terminal. 2. Remove the mirror (C) after disconnecting the heater connector (A) and BSD warning connector (B). 3. Remove the ...
Other information:
Kia Optima Hybrid (TF HEV) 2016-2020 Service Manual: NVLD(Natural Vacuum Leakage Detection) Repair procedures
Removal 1. Turn the ignition switch OFF and disconnect the battery negative (-) terminal. 2. Disconnect the NVLD connector (A). 3. Disconnect the ventilation hoses (B,C). 4. Remove the NVLD after by loosening the bolts (A). Installation • Install the component with the specified torques. • Note that ...
Kia Optima Hybrid (TF HEV) 2016-2020 Service Manual: Audio Remote Control Schematic Diagrams
Circuit Diagram ...
© 2025 Copyright www.koptimatfhev.com


