Kia Optima Hybrid: Rear Suspension System / Trailing Arm Repair procedures
| Replacement |
| 1. |
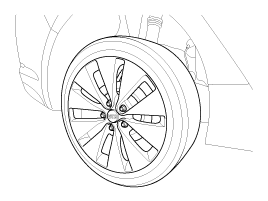
Remove the rear wheel & tire.
|

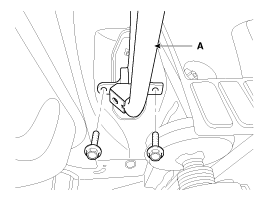
| 2. |
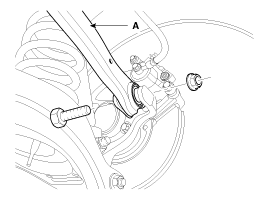
Loosen the bolt & nut and then remove the rear upper arm (A) from the rear axle.
|
| 3. |
Loosen the bolt and then remove the rear caliper (A).
|
| 4. |
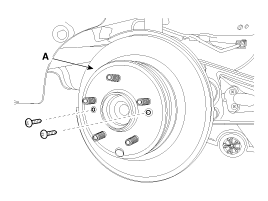
Loosen the screw and then remove the rear disc (A).
|
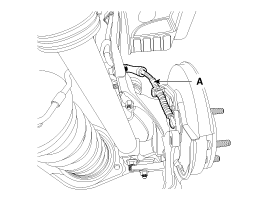
| 5. |
Disconnect the parking brake cable (A) from the rear brake assembly.
(Refer to BR group - "Parking brake system)
|
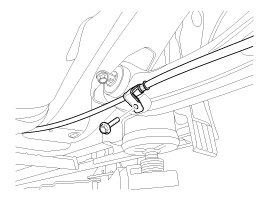
| 6. |
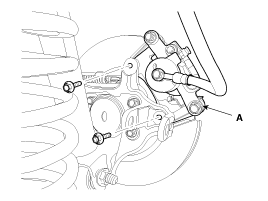
Loosen the parking brake cable bracket bolt (A) & height sensor bracket bolt (B).
|
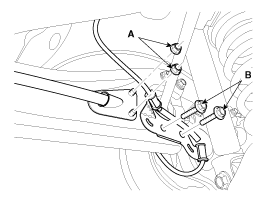
| 7. |
Loosen the mounting bolt and then remove the trailing arm (A) from the rear axle.
|
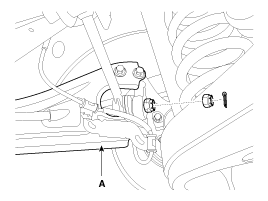
| 8. |
Loosen the mounting bolt and then remove the trailing arm (A) from the frame.
|
| 9. |
Installation is the reverse of removal. |
 Rear Assist Arm Repair procedures
Replacement 1. Remove the rear wheel & tire. Tightening torque: 88.3 ~ 107.9 N.m(9.0 ~ 11.0kgf.m, 65.1 ~ 79.6lb-ft) Be careful not to damage the hub bolts when removing the rear wheel ...
 Rear Cross Member Repair procedures
Replacement 1. Remove the rear wheel & tire. Tightening torque: 88.3 ~ 107.9N.m(9.0 ~ 11.0kgf.m, 65.1 ~ 79.6lb-ft) Be careful not to damage the hub bolts when removing the rear wheel ...
Other information:
Kia Optima Hybrid (TF HEV) 2016-2020 Service Manual: Rear Body Body Repair
Side outer panel rear cornerRear package tray trim mounting hole (O10)Rear transverse trim mounting hole (O8.4)Rear combination lamp mounting hole (8.5X8.5)Rear bumper mounting hole (11X13) ...
Kia Optima Hybrid (TF HEV) 2016-2020 Service Manual: Rear Hub - Carrier Repair procedures
Replacement 1. Loosen the wheel nuts slightly. Raise the vehicle, and make sure it is securely supported. 2. Remove wheel nuts, rear wheel and tire from rear hub. Tightening torque: 88.2 ~ 107.8 N.m (9.0 ~ 11.0 kgf.m, 65.0 ~ 79.5 lb-ft) Be careful not to damage to the wheel nuts when removing ...