Kia Optima Hybrid: Rear Suspension System / Rear Shock Absorber Repair procedures
| Replacement |
| 1. |
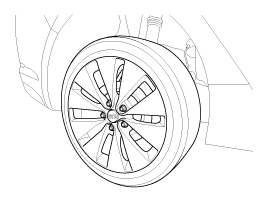
Remove the rear wheel & tire.
|
| 2. |
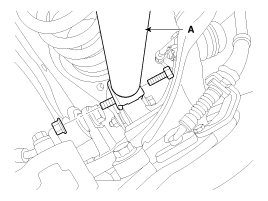
Loosen the bolt & nut and then disconnect the shock absorber (A) from the rear axle.
|
| 3. |
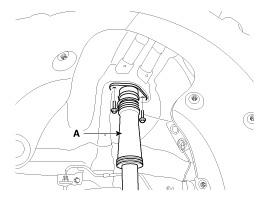
Loosen the mounting bolts and then remove the shock absorber (A).
|
| 4. |
Installation is the reverse of removal.
|
| Inspection |
| 1. |
Check the rubber parts for wear and deterioration. |
| 2. |
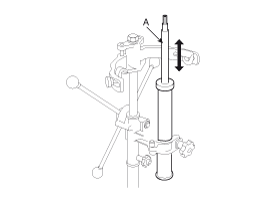
Compress and extend the piston rod (A) and check that there is no abnormal resistance or unusual sound during operation.
|
 Rear Shock Absorber Components and Components Location
Components 1. Self locking nut2. Bracket assembly3. Bumper rubber4. Dust cover5. Shock absorber ...
 Rear Upper Arm Repair procedures
Replacement 1. Remove the rear wheel & tire. Tightening torque: 88.3 ~ 107.9N.m(9.0 ~ 11.0kgf.m, 65.1 ~ 79.6lb-ft) Be careful not to damage the hub bolts when removing the rear wheel ...
Other information:
Kia Optima Hybrid (TF HEV) 2016-2020 Service Manual: Canister Close Valve (CCV) Repair procedures
Removal 1. Turn the ignition switch OFF and disconnect the battery negative (-) terminal. 2. Lift the vehicle. 3. Disconnect the canister close valve connector (A). 4. Disconnect the ventilation hose (B) from the fuel tank air filter and canister close valve. 5. Remove the fuel tank air filter assembly ...
Kia Optima Hybrid (TF HEV) 2016-2020 Service Manual: Troubleshooting
Troubleshooting Fault Diagnosis Features a fail-safe mechanism that prevents dangerous situations from developing in the event of a transaxle failure. The limp home mode engages if the transaxle malfunctions. In this mode, the transaxle operates at a minimal functionality level, making it possible for ...


