Kia Optima Hybrid: Audio / Speakers Repair procedures
| Inspection |
| 1. |
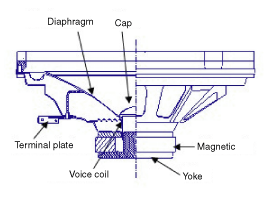
Troubleshooting for Speaker
|


| Removal |
| 1. |
Remove the front door trim panel and speaker connector.
(Refer to the BD group - "Front door") |
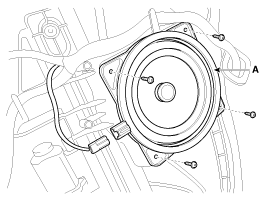
| 2. |
Remove the front speaker (A) after loosening 4 screws.
|
| 1. |
Remove the rear door trim panel and speaker connector.
(Refer to the BD group - "Rear door") |
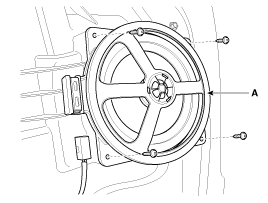
| 2. |
Remove the rear speaker (A) after removing 4 screws.
|
| 1. |
Remove the main crash pad.
(Refer to the BD group - "Crash pad") |
| 2. |
Disconnect the midrange speaker connector (A).
|
| 3. |
Remove the crash pad side speaker grill (A).
|
| 4. |
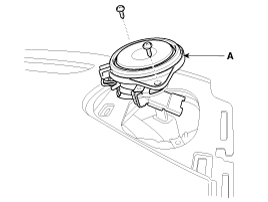
Remove the midrange speaker (A) after loosening the mounting screws.
|
| 1. |
Remove the rear seat forward.
(Refer to the BD group - "Rear seat") |
| 2. |
Remove the rear package tray.
(Refer to the BD group - "Package tray") |
| 3. |
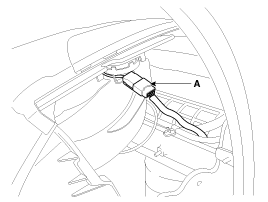
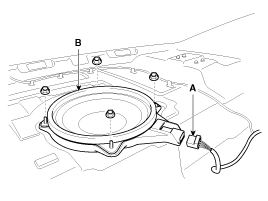
Disconnect the subwoofer speaker connector (A). |
| 4. |
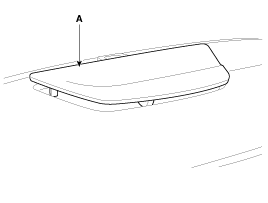
Remove the subwoofer speaker (B) after removing 4 bolts.
|
| 1. |
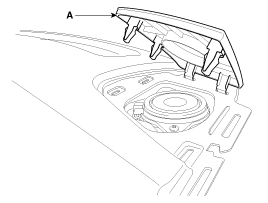
Remove the center speaker grill (A).
|
| 2. |
Remove the center speaker (A) after loosening the mounting screws.
|

| Installation |
| 1. |
Install the front speaker. |
| 2. |
Install the front door trim. |
| 1. |
Install the rear speaker. |
| 2. |
Install the rear door trim. |
| 1. |
Install the midrange speaker. |
| 2. |
Install the speaker grille. |
| 1. |
Install the subwoofer speaker after connecting the connector. |
| 2. |
Install the rear package tray and rear seat assembly. |
| 1. |
Install the center speaker. |
| 2. |
Install the center speaker grill. |
 Audio Unit Repair procedures
Removal • Take care not to scratch the center fascia panel and related parts. • Eject all the disc before removing the audio unit to prevent damaging the CD player''s load mechanism. ...
 Antenna Repair procedures
Inspection Glass Antenna Test 1. Wrap aluminum foil (A) around the tip of the tester probe (B) as shown. 2. Touch one tester probe to the glass antenna terminal (A) and move the other tester probe along ...
Other information:
Kia Optima Hybrid (TF HEV) 2016-2020 Service Manual: Specifications
Specification Air Conditioner ItemSpecificationCompressorTypeESC33iOil type & CapacityPOE OIL 3.8~4.5oz. (115~135cc)Motor typeBLDCDisplacement33cc/revCondenserHeat rejection14,000 ± 5% kcal/hrA/C Pressure transducerThe method to measure the pressureVoltage = 0.00878835 * Pressure (psig) + 0.5Expansion ...
Kia Optima Hybrid (TF HEV) 2016-2020 Service Manual: Purge Control Solenoid Valve (PCSV) Specifications
Specification ItemSpecificationCoil Resistance (?)19.0 ~ 22.0 [20°C(68°F)] ...