Kia Optima Hybrid: Lighting System / Room Lamp Repair procedures
| Inspection |
| 1. |
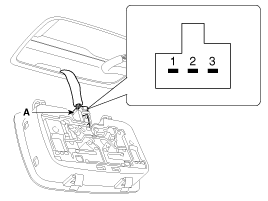
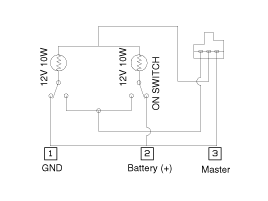
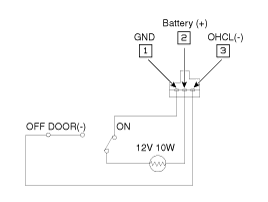
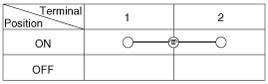
Check that the switch operates properly after disconnecting the room lamp connector (A).
[A type]
[B type]
|
| Removal |
| 1. |
Disconnect the negative(-) battery terminal. |
| 2. |
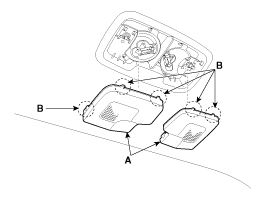
Carefully remove the lamp lens (A) from the room lamp with a flat-tip screwdriver.
[A type]
[B type]
|

| 3. |
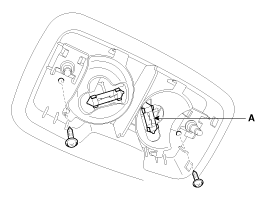
Replace the bulbs (A) and remove the screws if it is necessary.
|
| 4. |
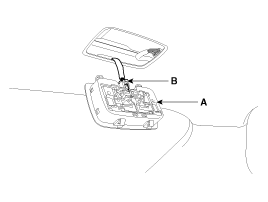
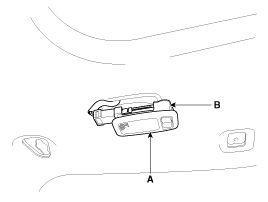
Remove the room lamp assembly (A) after disconnecting the connector (B).
|
| 1. |
Disconnect the negative (-) battery terminal. |
| 2. |
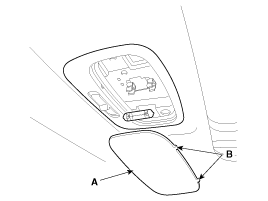
Remove the vanity lamp (A) by pressing the clip (B) with a small screwdriver.
|
| 3. |
Remove the vanity lamp assembly after disconnecting the connector. |
| Installation |
| 1. |
Reconnect the connector. |
| 2. |
Install the room lamp assembly. |
| 3. |
Install the lens. |
| 1. |
Reconnect the vanity lamp connector. |
| 2. |
Install the vanity lamp. |
 Head Lamps Repair procedures
Inspection 1. Check-points upon head lamp failure (HID) (1) Check the battery voltage. (Low beam will be on when the battery voltage above 9V.) (2) Check the fuse and relay. (3) Check the polarity of ballast. ...
 Overhead Console Lamp Schematic Diagrams
Circuit Diagram ...
Other information:
Kia Optima Hybrid (TF HEV) 2016-2020 Service Manual: Description and Operation
Description Exhaust emissions (CO, HC, NOx) are controlled by a combination of engine modifications and the addition of special control components. Modifications to the combustion chamber, intake manifold, camshaft and ignition system form the basic control system. These items have been integrated into ...
Kia Optima Hybrid (TF HEV) 2016-2020 Service Manual: Water pump Repair procedures
Removal and Installation 1. Loosen the drain plug, and then drain the engine coolant. Remove the radiator cap to help drain the coolant faster. 2. Remove the water pump drive belt (A). (1) Put the SST (09252-3D100) between the crankshaft pulley and the drive belt. (2) Rotate the crankshaft pulley clockwise. ...