Kia Optima Hybrid: Heater / Heater Unit Repair procedures
| Replacement |
| 1. |
Disconnect the negative (-) battery terminal. |
| 2. |
Recover the refrigerant with a recovery/ recycling/ charging station.
|

| 3. |
When the engine is cool, drain the engine coolant from the radiator. |
| 4. |
Remove the expansion valve cover (A).
|
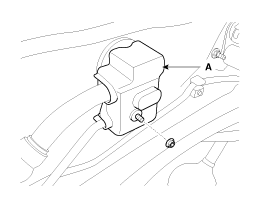
| 5. |
Remove the bolts (A) and the expansion valve (B) from the evaporator core.
|
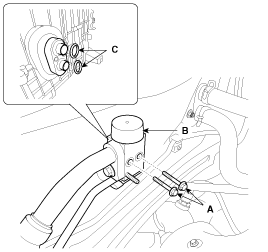
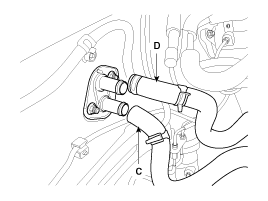
| 6. |
Disconnect the inlet (C) and outlet (D) heater hoses from the heater unit.
|
| 7. |
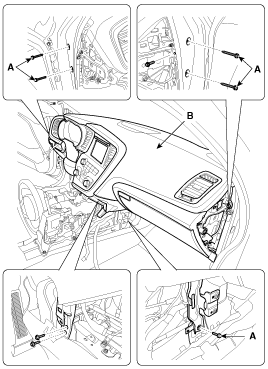
Remove the center console.
(Refer to BD group - “Center Console”) |
| 8. |
Remove the shift lever housing assembly.
(Refer to TR grou - “Shift Lever”) |
| 9. |
Remove the steering handle and column.
(Refer to ST group - “Steering Column”) |
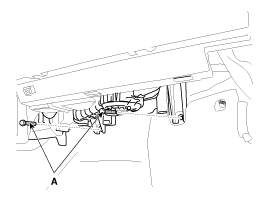
| 10. |
Loosen the cowl cross member mounting bolts (A).
|
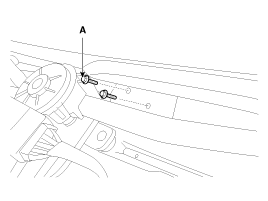
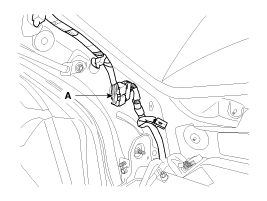
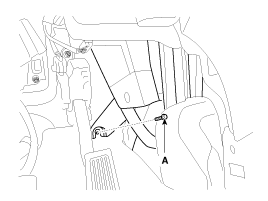
| 11. |
Remove the front pillar trim and then disconnect the connector (A).
|
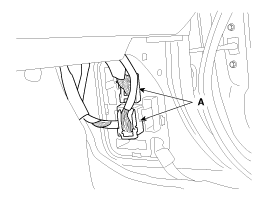
| 12. |
Disconnect the air bag connector (A).
|
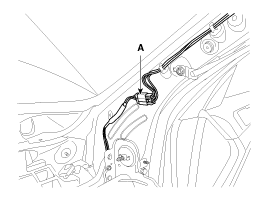
| 13. |
Remove the cowl side trim and then disconnect the connectors (A).
|
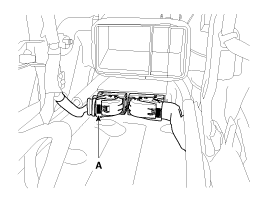
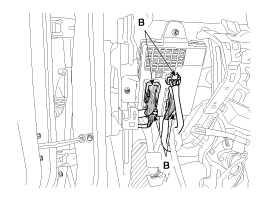
| 14. |
Disconnect the fuse box connector (B).
|
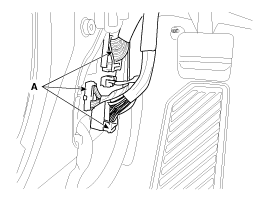
| 15. |
Loosen the heater & blower unit mounting bolts.
|
| 16. |
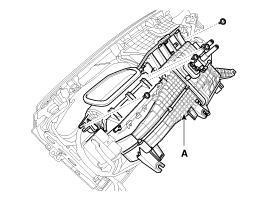
Loosen the cowl cross member mounting bolts (A) and then remove the crash pad and heater blower unit (B).
|
| 17. |
Disconnect the connectors and then remove the heater blower unit (A) from crash pad.
|
| 18. |
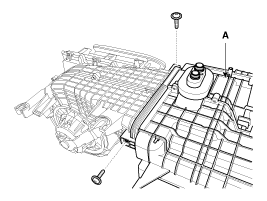
Remove the blower unit (A) from heater unit after loosening screws.
|

| 19. |
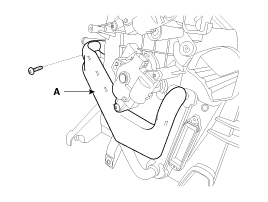
Loosen the mounting screw and then remove the heater core cover (A).
|
| 20. |
Disconnect the heater core (A) from heater unit.
|
| 21. |
Loosen the mounting screws and then remove the heater unit lower case (A).
|
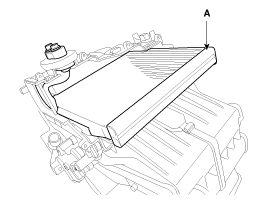
| 22. |
Remove the evaporator core (A).
|
| 23. |
Installation is the reverse order of removal.25. Installation is the reverse order of removal, and note these items :
|
 Heater Unit Components and Components Location
Component Location Components 1. Heater Case (LH)2. Separator3. Evaporator Core4. Shower Duct5. Heater Core Cover6. Heater Core7. Mode Actuator8. Mode Cam9. Temp Actuator10. Vent Door Arm11. Floor Door ...
 Temperature Control Actuator Components and Components Location
Component Location ...
Other information:
Kia Optima Hybrid (TF HEV) 2016-2020 Service Manual: Canister Close Valve (CCV) Repair procedures
Removal 1. Turn the ignition switch OFF and disconnect the battery negative (-) terminal. 2. Lift the vehicle. 3. Disconnect the canister close valve connector (A). 4. Disconnect the ventilation hose (B) from the fuel tank air filter and canister close valve. 5. Remove the fuel tank air filter assembly ...
Kia Optima Hybrid (TF HEV) 2016-2020 Service Manual: Panoramaroof Components and Components Location
Components 1. Roof moulding [RH]2. Roof moulding [LH]3. Movable glass4. Cover [RH]5. Wind deflector assembly6. Front cover assembly7. Panoramaroof frame assembly8. Cover [LH]9. Shield cover10. Wind deflector bar link11. Roller blind assembly12. Movable glass motor assembly13. Roller blind motor assembly14. ...