Kia Optima Hybrid: Fuel Filler Door / Fuel Filler Door Open Switch Repair procedures
Kia Optima Hybrid (TF HEV) 2016-2020 Service Manual / Body Electrical System / Fuel Filler Door / Fuel Filler Door Open Switch Repair procedures
| Inspection |
| 1. |
Remove the driver door trim.
(Refer to the BD group - "Front door") |
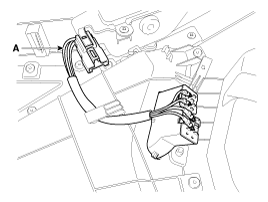
| 2. |
Remove the switch assembly connector (A) from the door trim.
|
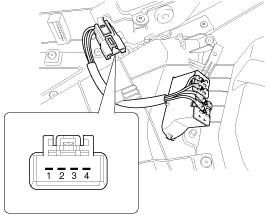
| 3. |
Check for continuity between the terminal No.1 and No.2.
|
| 4. |
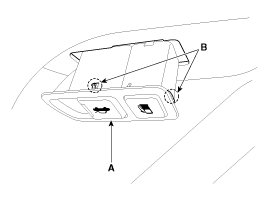
Remove the fuel filler door switch assembly (A) after pressing the fixing clips (B).
|
 Fuel Filler Door Release Actuator Repair procedures
Inspection 1. Remove the trunk room left side trim. (Refer to the BD group - "Interior trim") 2. Remove the fuel filler door release actuator (A) after loosening the mounting bolts. 3. Disconnect the release ...
 Fuses And Relays
...
Other information:
Kia Optima Hybrid (TF HEV) 2016-2020 Service Manual: Components and Components Location
Components 1. Front seat belt2. Height adjuster3. Rear seat belt [RH]4. Rear center seat belt5. Rear seat belt [LH]6. Rear seat belt buckle ...
Kia Optima Hybrid (TF HEV) 2016-2020 Service Manual: SS-A Solenoid Valve (ON/OFF) Specifications
Specifications ON/OFF Solenoid Valve(SS-A, SS-B) Control type : Normal low type Control pressure kpa(kgf/cm?, psi)490.33 (5.0, 71.12) Internal resistance(?)10 ~ 11 ...
© 2025 Copyright www.koptimatfhev.com