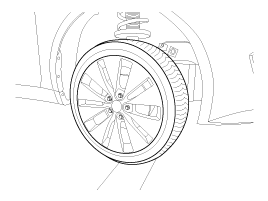
Kia Optima Hybrid: Front Suspension System / Front Stabilizer Bar Repair procedures
| Replacement |
| 1. |
Remove the front wheel & tire.
|

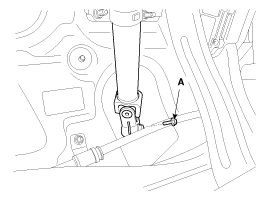
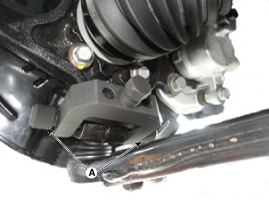
| 2. |
Loosen the bolt (A) and then disconnect the universal joint assembly from the pinion of the steering gear box.
|
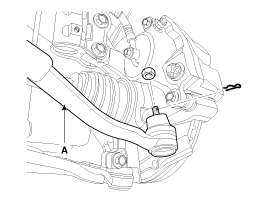
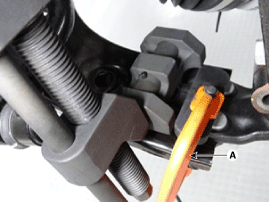
| 3. |
Remove the split pin and castle nut and then disconnect the tie-rod end (A) from the front knuckle.
|
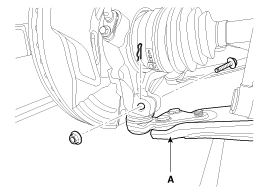
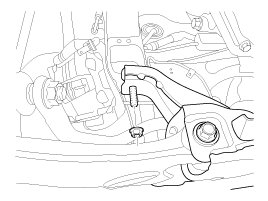
| 4. |
Loosen the bolt & nut and then remove the lower arm (A).
|
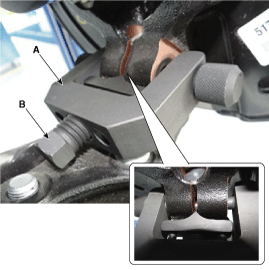
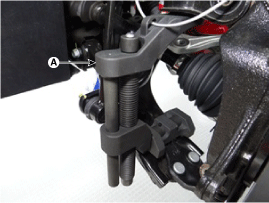
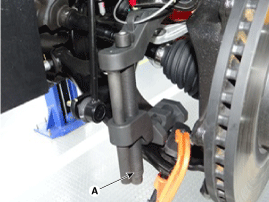
| 5. |
Remove the front lower arm from the front knuckle using the SST (0K545-A9100).
|
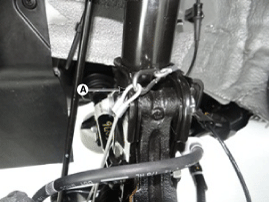

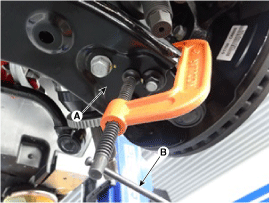
| 6. |
Disconnect the stabilizer link (B) from the front strut assembly (A) after loosening the nut.
|
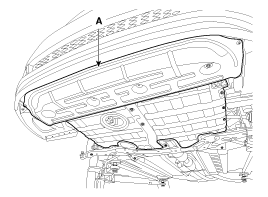
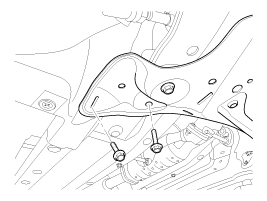
| 7. |
Remove the undercover (A).
|
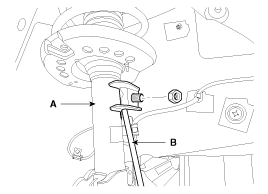
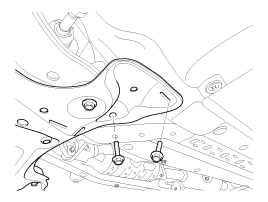
| 8. |
Loosen the bolt (A) & nut (B) and then remove the roll rod stopper.
|
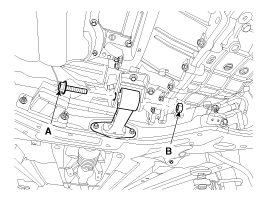
| 9. |
Disconnect the muffler rubber hanger (A).
|

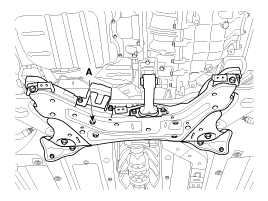
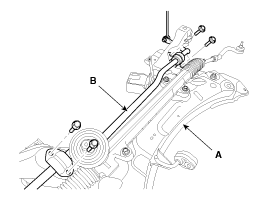
| 10. |
Loosen the bolts & nuts and then remove the sub frame (A).
|

| 11. |
Loosen the mounting bolt and then remove the stabilizer bar (B) from the sub frame(A).
|
| 12. |
Loosen the nut and then remove the stabilizer link (A) from the stabilizer bar.
|
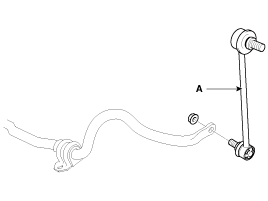
| 13. |
Installation is the reverse of removal. |
| Inspection |
| 1. |
Check the bushing for wear and deterioration. |
| 2. |
Check the front stabilizer bar for deformation. |
| 3. |
Check the front stabilizer link ball joint for damage. |
 Front Lower Arm Repair procedures
Replacement 1. Remove the front wheel & tire. Tightening torque: 88.3 ~ 107.9N.m(9.0 ~ 11.0kgf.m, 65.1 ~ 79.6lb-ft) Be careful not to damage to the hub bolts when removing the front wheel ...
 Front Cross Member Repair procedures
Replacement 1. Remove the front wheel & tire. Tightening torque: 88.3 ~ 107.9N.m(9.0 ~ 11.0kgf.m, 65.1~79.6lb-ft) Be careful not to damage to the hub bolts when removing the front wheel ...
Other information:
Kia Optima Hybrid (TF HEV) 2016-2020 Service Manual: Components and Components Location
Components 1. Steering wheel2. Steering column3. ECU4. Motor5. Steering gear box MDPS Circuit Diagram Harness Connector TypePin NoDescriptionBattery1Battery -2Battery +Vehicle1IGN2-3-4-5-6-7High_CAN8Low_CAN ...
Kia Optima Hybrid (TF HEV) 2016-2020 Service Manual: Specifications
Specification Audio ItemSpecificationModelRADIO/CD/MP3/SDARS (PA30AS)UVO2/ Bristiol audioInternal AmplifierPower supplyDC 14.4 V Negative groundOutput max power43W ? 4 : 14.4VLoad impedance (?)4 ? x 44 ?Antenna80 pF 75 ?Tunning typePLL synthesized tuningDark currentMax.1.0mA (Head unit only)Max. 3.0mA ...