Kia Optima Hybrid: Evaporative Emission Control System / Canister Repair procedures
| Removal |
| 1. |
Turn the ignition switch OFF and disconnect the auxiliary battery 12 (V) negative (-) terminal. |
| 2. |
Lift the vehicle. |
| 3. |
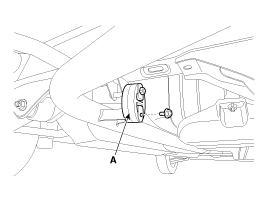
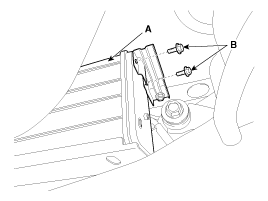
Remove the rear muffler hanger (A).
|
| 4. |
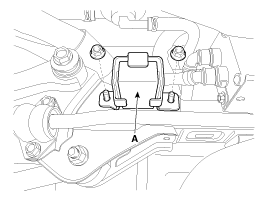
Remove the rear suspension damper (A).
|
| 5. |
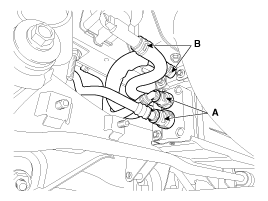
Disconnect the vapor tube quick connectors (A) and ventilation hoses (B).
|
| 6. |
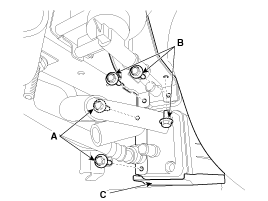
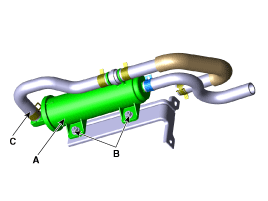
Separate the canister from auxiliary canister by loosening the canister mounting bracket mounting bolts (A). |
| 7. |
Remove the canister bracket mounting bolts (B). |
| 8. |
Remove the canister protector (C).
|
| 9. |
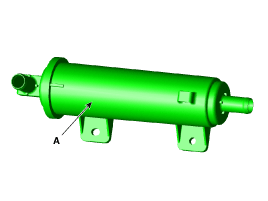
Remove the canister (A) by loosening the canister bracket mounting bolts (B).
|
| 10. |
Remove the auxiliary canister (A) by removing the nuts (B) and disconnecting the ventilation hoses (C).
|
| Inspection |
| 1. |
Check for the following items visually.
- Cracks or leakage of the canister
- Loose connection, distortion, or damage of the vapor hose/tube
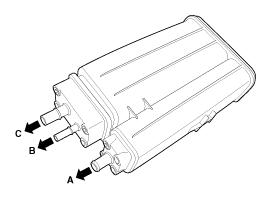
A: Canister - Atmosphere
(NVLD module and Fuel Tank Air Filter)
B: Canister - Intake Manifold (PCSV)
C: Canister - Fuel Tank
|
| Installation |
Canister installation bolt:
3.9 ~ 5.9 N.m (0.4 ~ 0.6 kgf.m, 2.9 ~ 4.3 lb-ft)
Canister poretector installation bolt:
8.8 ~ 13.7 N.m (0.9 ~ 1.4 kgf.m, 6.5 ~ 10.1 lb-ft)
Auxiliary canister installation bolt:
3.9 ~ 5.9 N.m (0.4 ~ 0.6 kgf.m, 2.9 ~ 4.3 lb-ft) |
 Repair procedures
Inspection When the engine is shut off, the pressure change in the fuel tank by the ambient temperature is monitored by NVLD and when the engine is started, ECM judges whether there is a leak or not through ...
 Fuel Filler Cap Description and Operation
Description A ratchet tightening device on the threaded fuel filler cap reduces the chances of incorrect installation, which seals the fuel filler. After the gasket on the fuel filler cap and the filler ...
Other information:
Kia Optima Hybrid (TF HEV) 2016-2020 Service Manual: Line Pressure Control Solenoid Vale Repair procedures
Inspection 1. Turn ignition switch OFF. 2. Remove the air duct (A). Tightening torque: 7.8 ~ 9.8 N.m (0.8 ~ 1.0 kgf.m, 5.8 ~ 7.2 lb-ft) 3. Remove the air cleaner assembly. (1) Disconnect the breather hose (A). (2) Disconnect the air intake hose (B) and then remove the air cleaner assembly (C). Tightening ...
Kia Optima Hybrid (TF HEV) 2016-2020 Service Manual: Radiator Components and Components Location
Components 1. Cooling fan assembly2. Radiator assembly3. Mounting insulator4. Radiator mounting bracket5. Radiator upper hose6. Radiator lower hose7. Reservoir tank8. Over flow hose ...

