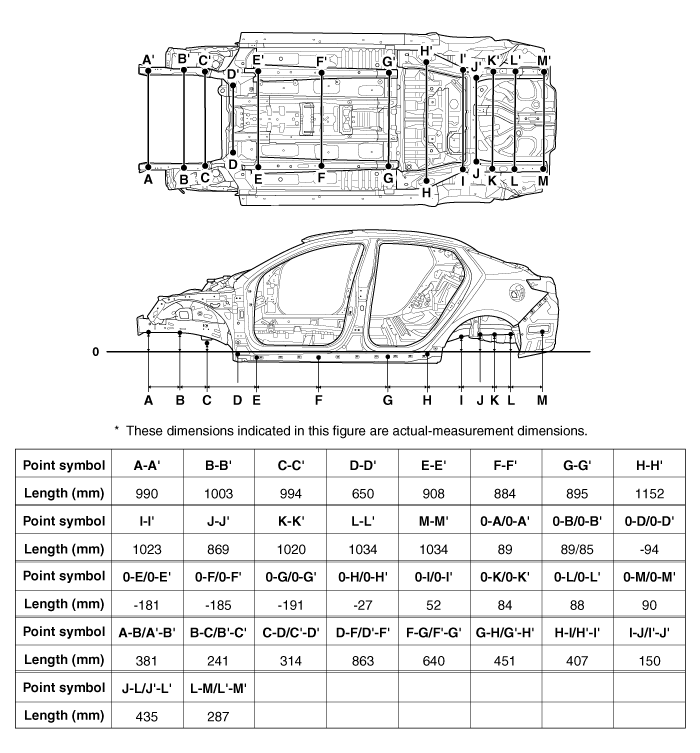
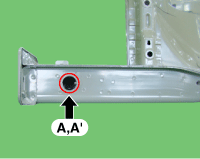
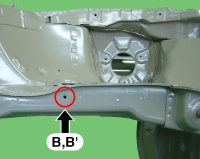
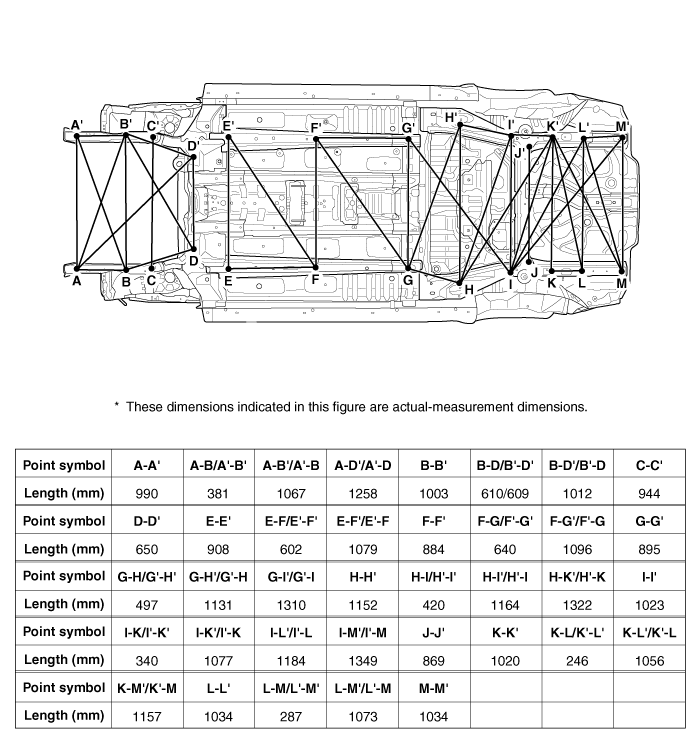
Kia Optima Hybrid: Body Dimensions / Under Body Body Repair
| Projected Dimensions |
|
|
|
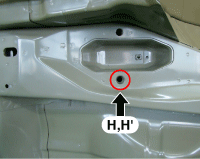
| Front side member tooling hole (O25) | Side cover mounting hole (O9) | Front sub frame mounting bolt |
|
|
|
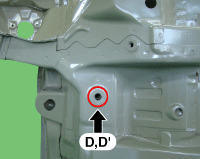
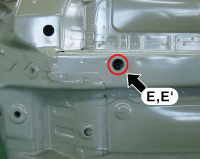
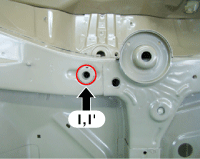
| Front sub frame mounting hole (O16.5) | Front side member tooling hole (O25) | Front side member tooling hole (O14.5) |
|
|
|
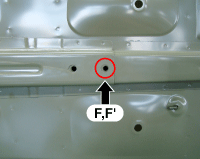
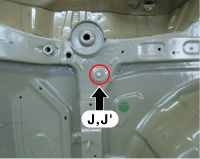
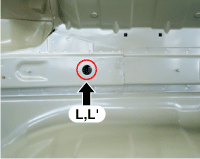
| Center floor side panel tooling hole (O20) | Real trailing arm mounting hole (O19) | Rear sub frame mounting hole (O16) |
|
|
|
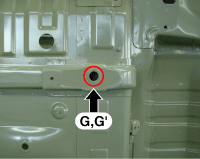
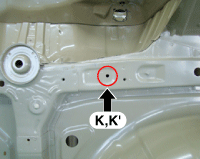
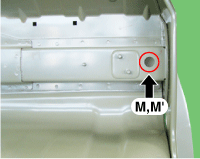
| Rear sub frame mounting bolt | Fuel line bracket mounting hole (O8) | Rear floor side member tooling hole (O23) |
| ||
| Rear floor side member tooling hole (O20) |
| Actual-Measurement Dimensions |
|
|
|
| Front side member tooling hole (O25) | Side cover mounting hole (O9) | Front sub frame mounting bolt |
|
|
|
| Front sub frame mounting hole (O16.5) | Front side member tooling hole (O25) | Front side member tooling hole (O14.5) |
|
|
|
| Center floor side panel tooling hole (O20) | Real trailing arm mounting hole (O19) | Rear sub frame mounting hole (O16) |
|
|
|
| Rear sub frame mounting bolt | Fuel line bracket mounting hole (O8) | Rear floor side member tooling hole (O23) |
| ||
| Rear floor side member tooling hole (O20) |
 Rear Body Body Repair
Side outer panel rear cornerRear package tray trim mounting hole (O10)Rear transverse trim mounting hole (O8.4)Rear combination lamp mounting hole (8.5X8.5)Rear bumper mounting hole (11X13) ...
 Exterior
...
Other information:
Kia Optima Hybrid (TF HEV) 2016-2020 Service Manual: Schematic Diagrams
System Block Diagram Component Parts And Function Outline Component partFunctionECUControls engine.MCUControls drive motor.ABSSends vehicle speed to HCU.HCUReceives signals from sensor and control switches.Cluster (Cruise control indicator)Illuminate when CRUISE main switch is ON (Built into cluster)Cruise ...
Kia Optima Hybrid (TF HEV) 2016-2020 Service Manual: Heated Oxygen Sensor (HO2S) Repair procedures
Inspection 1. Turn the ignition switch OFF. 2. Disconnect the HO2S connector. 3. Measure resistance between the HO2S terminals 4 and 5 [B1/S1]. Measure resistance between the HO2S terminals 3 and 4 [B1/S2]. 4. Check that the resistance is within the specification. HO2S [Bank 1/Sensor 1] (Linear type) ...