Kia Optima Hybrid: Electric Power Steering / Steering Column and Shaft Repair procedures
| Replacement |
| 1. |
Disconnect the battery negative cable from the battery and then wait for at least 30 seconds. |
| 2. |
Turn the steering wheel so that the front wheels can face straight ahead. |
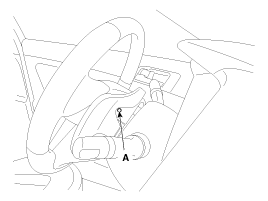
| 3. |
Push the pin (A) and then disconnect the airbag module from the steering wheel.
|
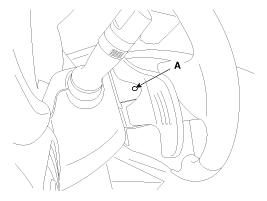
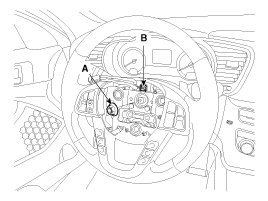
| 4. |
Disconnect the airbag module connector (A) & horn connector (B) and then remove the airbag module from the steering wheel.
|
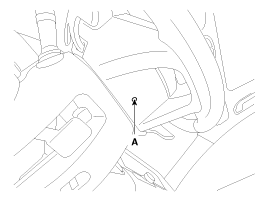
| 5. |
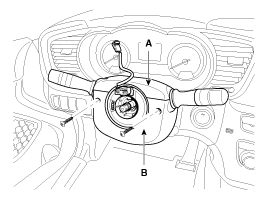
Disconnect the lock nut (A) & connector (B) and the remove the steering wheel from the steering column shaft.
|

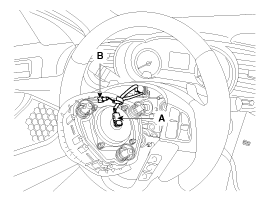
| 6. |
Loosen the screw and then remove the steering column upper (A) and lower (B) shroud.
|

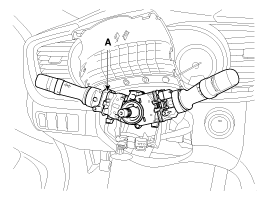
| 7. |
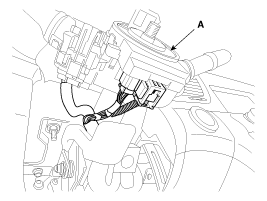
Disconnect the connector and then remove the clock spring (A).
|
| 8. |
Disconnect the connector & screw and then remove the multifunction switches (A).
|
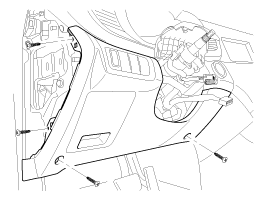
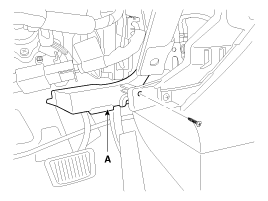
| 9. |
Remove the crash lower panel.
|
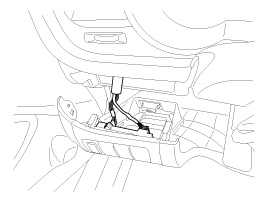
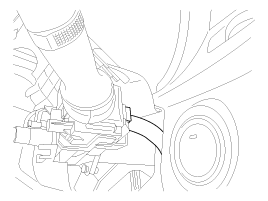
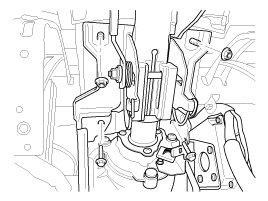
| 10. |
Loosen the bolt (A) and then disconnect the universal joint assembly from the pinion of the steering gear box.
|
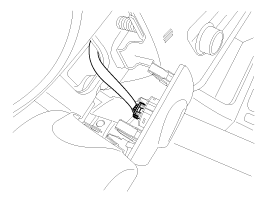
| 11. |
Loosen the screw and then remove the shower duct (A).
|
| 12. |
Disconnect all connectors connected to the steering column. |
| 13. |
Remove the steering column by loosening the mounting bolts and nuts..
|
| 14. |
Installation is the reverse of the removal. |
| 15. |
Compensate the steering angle sensor after replaceing the steering column. |
| Disassembly |
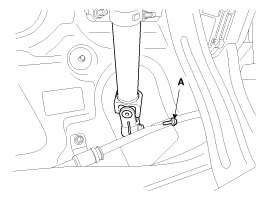
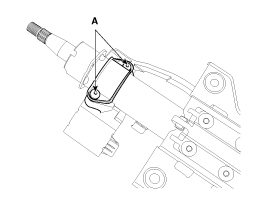
| 1. |
Loosen the bolt (A) and then disconnect the universal joint assembly from the steering column assembly.
|
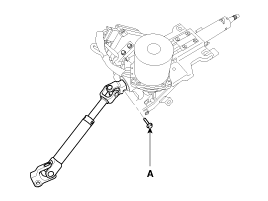
| 2. |
Reassembly is the reverse of the disassembly. |
| 1. |
Make a groove on the head of special bolts (A) by a punch. |
| 2. |
Loosen the special bolt using a screw driver and then remove the key lock assembly from the steering column assembly.
|
| 3. |
Reassembly is the reverse of the disassembly. |
| Inspection |
| 1. |
Check the steering column for damage and deformation. |
| 2. |
Check the joint bearing for damage and wear. |
| 3. |
Check the tilt bracket for damage and cracks. |
| 4. |
Check the key lock assembly for proper operation and replace it if necessary. |
| Adjustment |
| Test condition | Normal condition: Motor must not supply steering assist. | ||
| Symptom | Possible cause | Remedy | |
| IG Off | Motor supplies steering assist. | ASP is not calibrated. | Perform the ASP calibration using a scan tool. |
| IG power supplies | Inspect the IG power supply line. | ||
| Test condition | Normal condition: Motor must not supply steering assist, Warning lamp is illuminated. | ||
| Symptom | Possible cause | Remedy | |
| IG On/Engine Off | Motor supplies steering assist. | ASP is not calibrated. | Perform the ASP calibration using a scan tool. |
| EMS CAN signal is not received. | Inspect the CAN line. | ||
| Warning lamp is not illuminated. | Cluster fault | Inspect the cluster and cluster harness | |
| Test condition | Normal condition: Motor supplies steering assist, Warning lamp is not illuminated. | ||
| Symptom | Possible cause | Remedy | |
| IG On/Engine On | Warning lamp is illuminated and Motor dose not supply steering assist. | EPS (Hot at all times) and IG power supply fault | Inspect the connector and harness for EPS (Hot at all times) and IG power supply line. |
| DTC is detected by system. | Perform the self test using a scan tool and repair or replace. | ||
| Warning lamp is illuminated and Motor supplies steering assist. | ASP is not calibrated. | Perform the ASP calibration using a scan tool. | |
| CAN communication between EPS and cluster is fault. | Inspect the CAN line. | ||
The following symptoms may occur during normal vehicle
operation and if there is no EPS warning light illumination, it is not
malfunction of EPS system.
|
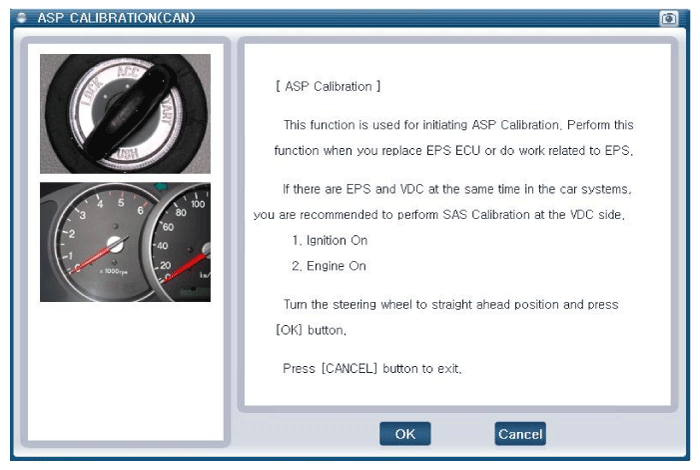
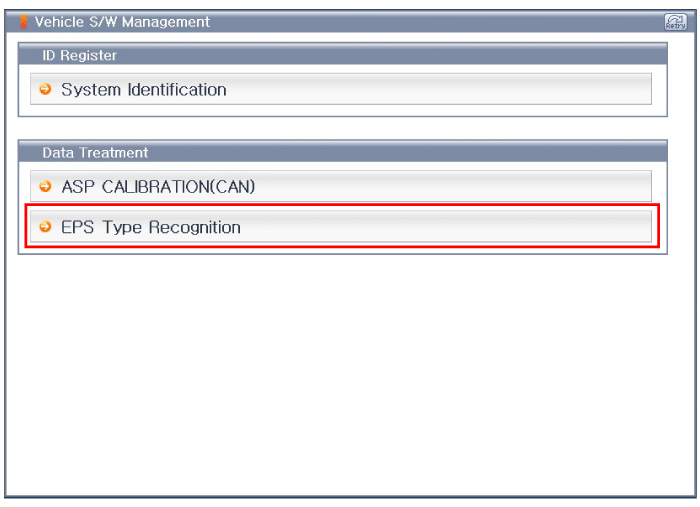
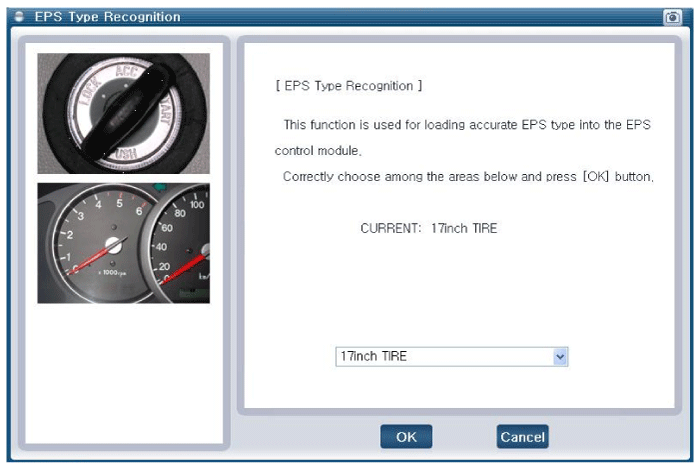
| • |
Check if the battery is fully charged before ASP calibration or EPS type recognition. |
| • |
Be careful not to disconnect any cables connected to the vehicle or scan tool during ASP calibration or EPS type recognition. |
| • |
When the ASP calibration or EPS type recognition is
completed, turn the ignition switch off and wait for several seconds,
then start the engine to confirm normal operation of the vehicle. |
| 1. |
Select "Steering Angle Sensor". |
| 2. |
Proceed with the test according to the screen introductions.
|
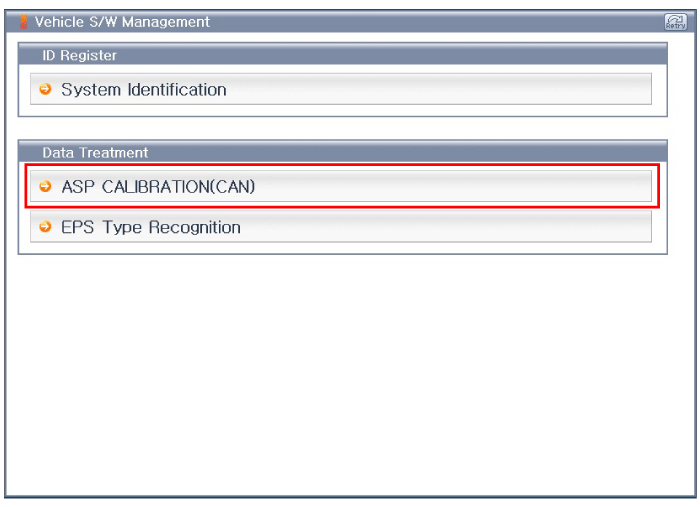
| 1. |
Select "EPS Variant Coding". |
| 2. |
Proceed with the test according to the screen introductions.
|
 Components and Components Location
Components 1. Steering wheel2. Steering column3. ECU4. Motor5. Steering gear box MDPS Circuit Diagram Harness Connector TypePin NoDescriptionBattery1Battery -2Battery +Vehicle1IGN2-3-4-5-6-7High_CAN8Low_CAN ...
 Steering Gear box Components and Components Location
Components 1. Tie rod end2. Lock nut3. Bellows 4. Bellows band5. Tie rod6. Rack bar 7. Dust packing 8. Dust cap9. Oil seal10. Pinion plug11. Pinion assembly12. Yoke plug13. Yoke spring14. Support yoke ...
Other information:
Kia Optima Hybrid (TF HEV) 2016-2020 Service Manual: Front Driveshaft Repair procedures
Replacement 1. Loosen the wheel nuts slightly. Raise the vehicle, and make sure it is securely supported. 2. Remove wheel nuts, front wheel and tire from front hub. Tightening torque: 88.2 ~ 107.8 N.m (9.0 ~ 11.0 kgf.m, 65.0 ~ 79.5 lb-ft) Be careful not to damage to the wheel nuts when ...
Kia Optima Hybrid (TF HEV) 2016-2020 Service Manual: Audio Remote Control Repair procedures
Inspection 1. Check the audio remote control switch (A) for resistance between connector terminals in each switch position. [LH-Audio] [LH-Mute] [Audio] SwitchConnector terminalResistance (±5%)Volume down2-76.81 k?Volume up2-74.61 k?Mode2-72.11 k?Seek up2-71.11 k?Seek down2-7430 ? [Bluetooth + Voice] ...