Kia Optima Hybrid: Seat Belt / Rear Seat Belt Repair procedures
| Replacement |
|

| 1. |
Remove the following items first.
|
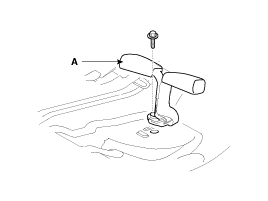
| 2. |
After loosening the mounting bolt, then remove the rear seat belt lower anchor (A).
|
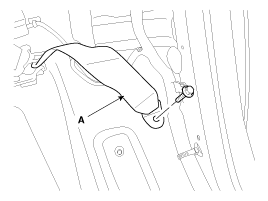
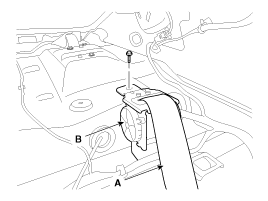
| 3. |
After loosening the retractor (B) mounting bolt, then remove the rear seat belt (A).
|
| 4. |
Installation is the reverse of removal.
|

| 1. |
Remove the rear seat cushion.
(Refer to the BD group - "Rear Seat") |
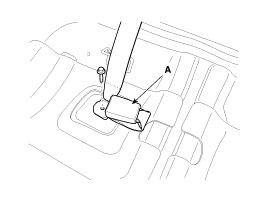
| 2. |
Loosen the mounting bolt, and then remove the rear seat belt buckle (A).
[LH]
[RH]
|
| 3. |
Installation is the reverse of removal. |
 Front Seat Belt Repair procedures
Replacement Front Seat Belt Replacement • When installing the belt, make sure not to damage the pretensioner. 1. Remove the following items first : • Front seat assembly (Refer to the ...

Other information:
Kia Optima Hybrid (TF HEV) 2016-2020 Service Manual: IMS Control Switch Repair procedures
Inspection 1. Remove the IMS control switch connector (A). 2. With the IMS control switch in each position, make sure that continuity exists between the terminals below. If continuity is not as specified, replace the IMS control switch. Driver Power Seat Control Switch (For IMS) Removal 1. Disconnect ...
Kia Optima Hybrid (TF HEV) 2016-2020 Service Manual: Oil Pump Uni t(OPU) Description and Operation
Description The oil pump main relay is installed within the HEV fusible link box of the engine room. When the Oil Pump Unit (OPU) triggers the oil pump main relay, electric current needed to operate the Electric Oil Pump (EOP) passes through the Oil Pump Unit (OPU) and is supplied to the Electric Oil ...