Kia Optima Hybrid: Hydraulic System / Oil Pump Uni t(OPU) Repair procedures
| Removal |
| 1. |
Disconnect the 12V battery negative (-) cable. |
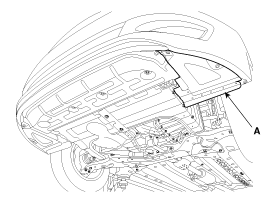
| 2. |
Remove the under cover (A).
|
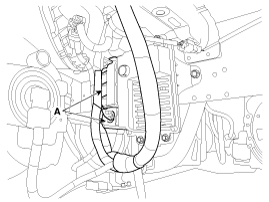
| 3. |
Remove the wiring fixed clip at bracket after removing oil pump connector (A).
|
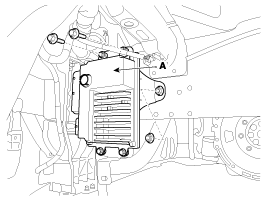
| 4. |
Remove the oil pump unit (A).
|
| Installation |
| 1. |
Install in the reverse order of removal. |
 Oil Pump Uni t(OPU) Schematic Diagrams
OPU connector and terminal function OPU terminal function [A] PinDescription1Main relay power2Ground3Motor phase power(U)4Motor phase power(V)5Motor phase power(W) [B] PinDescription1Battery power (+)2Battery ...
 Clutch & Brake
...
Other information:
Kia Optima Hybrid (TF HEV) 2016-2020 Service Manual: Rear Door Components and Components Location
Components 1. Rear door trim2. Rear door belt inside weatherstrip3. Rear door trim seal4. Rear door module5. Rear door panel6. Rear door side moulding7. Rear door belt outer weatherstrip8. Rear door DIV channel9. Rear door upper opening weatherstrip10. Rear door opening weatherstrip mounting moulding11. ...
Kia Optima Hybrid (TF HEV) 2016-2020 Service Manual: Cylinder Head Repair procedures
Removal • Use fender covers to avoid damaging painted surfaces. • To avoid damaging the cylinder head, wait until the engine coolant temperature drops below normal temperature before removing it. • When handling a metal gasket, take care not to fold the gasket or damage the contact ...


