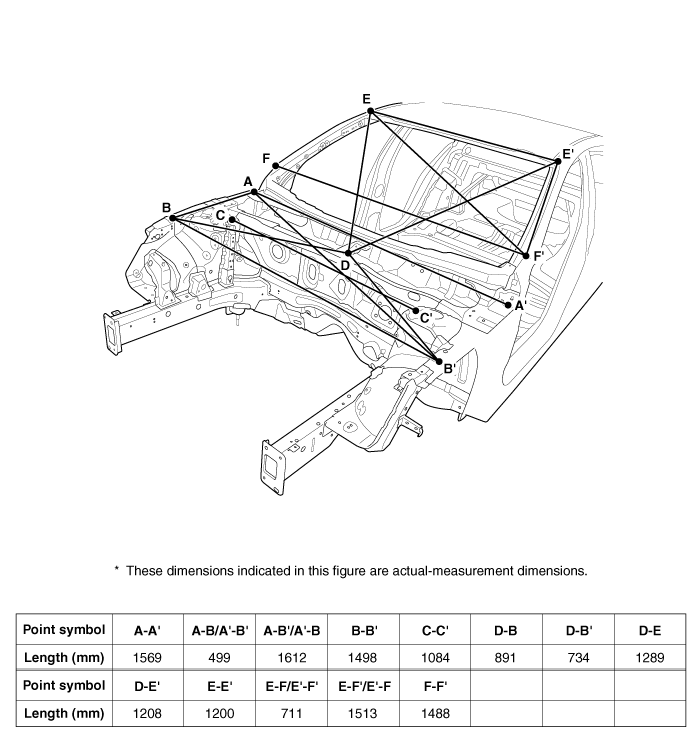
Kia Optima Hybrid: Body Dimensions / Front Body Body Repair
| Front Body A |
|
|
|
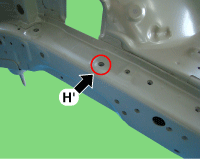
| Hood hinge mounting hole (O13) | Fender apron upper inner panel tooling hole (O6.6) | Front suspension mounting hole (O11) |
|
|
|
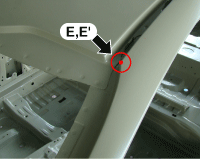
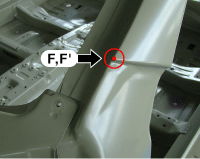
| Cowl panel tooling hole (O8) | Front pillar corner | Front pillar corner |

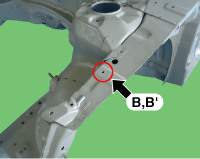
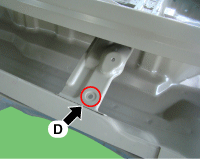
| Front Body B |

|
|
|
| Hood hinge mounting hole (O13) | Fender apron upper inner panel tooling hole (O6.6) | Engine mounting bracket hole (O11) |
|
|
|
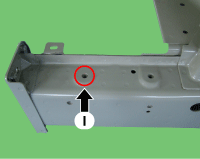
| Transaxle mounting hole (O13) | Engine mounting bracket hole (O11) | Transaxle mounting hole (O13) |
|
|
|
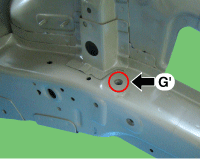
| Front side member tooling hole (O9) | Front side member tooling hole (O12) | Front end module mounting hole (O12) |

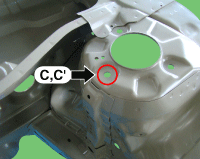
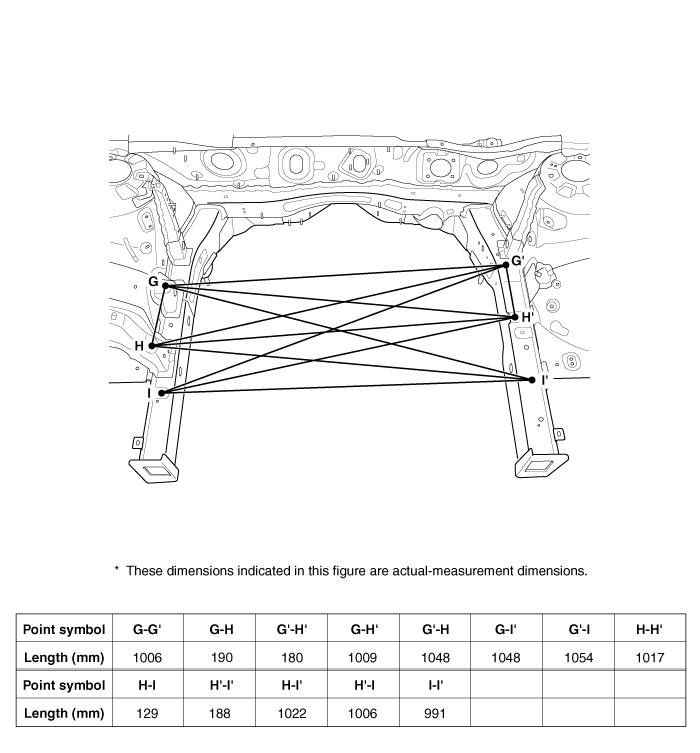
| Front Body C |
|
|
|
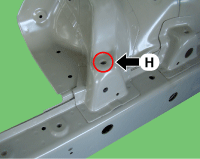
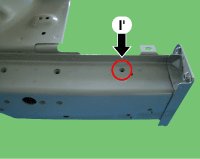
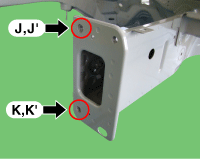
| Engine mounting bracket hole (O11) | Transaxle mounting hole (O13) | Engine mounting bracket hole (O11) |
|
|
|
| Transaxle mounting hole (O13) | Front side member tooling hole (O9) | Front side member tooling hole (O12) |
 General Information
General 1. Basically, all measurements in this manual are taken with a tracking gauge. 2. When a measuring tape is used, check to be sure there is no elongation, twisting or bending. 3. For measuring dimensions, ...
 Side Body Body Repair
Side Body A Front side member tooling hole (O20)Fender apron tooling hole (O10)Front door upper hinge mounting hole (O13)Front door lower hinge mounting hole (O13)Fender panel mounting hole (O6.6)Rear ...
Other information:
Kia Optima Hybrid (TF HEV) 2016-2020 Service Manual: Crankshaft Position Sensor (CKPS) Repair procedures
Inspection 1. Check the signal waveform of the CMPS and CKPS using the GDS. Specification: Refer to “Wave Form” Removal 1. Turn the ignition switch OFF and disconnect the battery negative (-) terminal. 2. Disconnect the crankshaft position sensor connector (A). 3. Remove the protector (A). 4. Remove ...
Kia Optima Hybrid (TF HEV) 2016-2020 Service Manual: High Voltage Shut-off Procedures
High Voltage Shut-off Procedures Be sure to read and follow the “General Safety Information and Caution” before doing any work related with the high voltage system. Failure to follow the safety instructions may result in serious electrical injuries. • High voltage components: ...