Kia Optima Hybrid: Interior / Console Repair procedures
| Replacement |
|
| 1. |
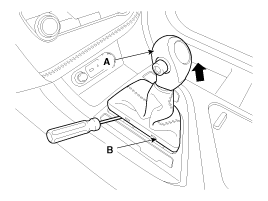
To remove the gear knob (A) pull up using moderate force. Then using a screwdriver or remover tool, remove the gear boot (B).
|
| 2. |
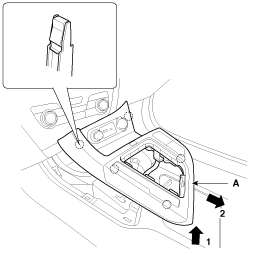
Using a screwdriver or remover, remove the floor console upper cover (A).
|
| 3. |
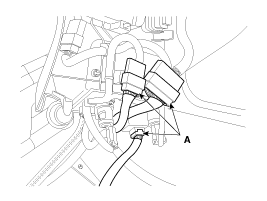
Disconnect the connectors (A).
|
| 4. |
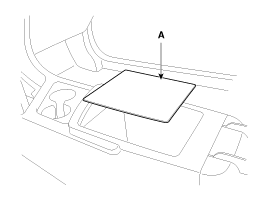
Remove the console tray mat (A).
|
| 5. |
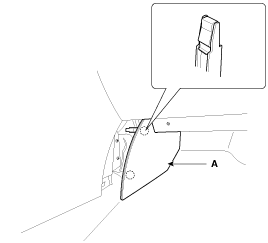
Using a screwdriver or remover, remove the floor console extension cover (A).
|
| 6. |
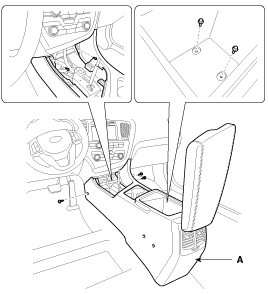
After loosening the mounting screws and bolts, then remove the floor console assembly (A).
|
| 7. |
Installation is the reverse of removal.
|
|
| 1. |
Remove the floor console assembly. |
| 2. |
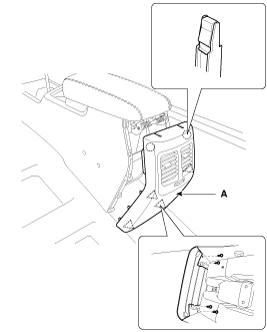
After loosening the mounting screws, then remove the rear console cover (A).
|
| 3. |
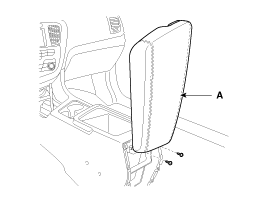
After loosening the mounting screws, then remove the armrest assembly (A).
|
| 4. |
Installation is the reverse of removal.
|
 Console Components and Components Location
Components 1. Floor console assembly2. Gear boots3. Floor console upper cover4. Floor console extension cover [LH]5. Floor console extension cover [RH]6. Console rear bracket ...
 Crash Pad Components and Components Location
Components 1. Main crash pad assembly2. Side speaker grille [LH]3. Airbag blanking cover4. Side speaker grille [RH]5. Center speaker grille6. Crash pad side cover [LH]7. Side air vent duct [LH]8. Center ...
Other information:
Kia Optima Hybrid (TF HEV) 2016-2020 Service Manual: Rear Wheel Speed Sensor Components and Components Location
Components 1. Rear wheel speed sensor 2. Rear wheel speed sensor cable ...
Kia Optima Hybrid (TF HEV) 2016-2020 Service Manual: Driver Airbag (DAB) Module and Clock Spring Repair procedures
Removal 1. Set the front tires straight-ahead before removing the steering wheel. If the steering wheel and the front tires are not set straight ahead together, it affects the number of circulation of steering wheel and the cable inside the clock spring is possible to be damaged. 2. Disconnect ...


