Kia Optima Hybrid: Exterior / Body Side Moulding Repair procedures
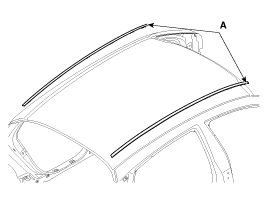
Roof Moulding Replacement
•
When prying with a flat-tip screwdriver, wrap it with
protective tape, and apply protective tape around the related parts, to
prevent damage.
•
Put on gloves to protect your hands.
•
Take care not to scratch the body surface.
1.
Using a screwdriver or remover, remove the roof moulding (A).
2.
Installation is the reverse of removal.
•
Replace any damaged clips.
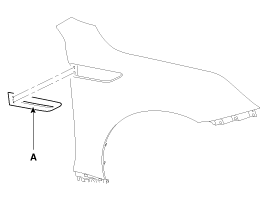
Fender Garnish Replacement
•
When prying with a flat-tip screwdriver, wrap it with
protective tape, and apply protective tape around the related parts, to
prevent damage.
•
Put on gloves to protect your hands.
•
Take care not to scratch the body surface.
1.
Using a screwdriver or remover, remove the fender garnish (A).
2.
Installation is the reverse of removal.
•
Replace any damaged clips.
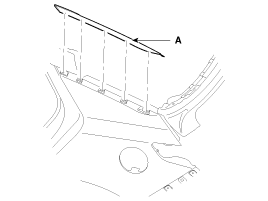
C Pillar Moulding Replacement
•
When prying with a flat-tip screwdriver, wrap it with
protective tape, and apply protective tape around the related parts, to
prevent damage.
•
Put on gloves to protect your hands.
•
Take care not to scratch the body surface.
1.
Using a screwdriver or remover, remove the C pillar moulding (A).
2.
Installation is the reverse of removal.
•
Replace any damaged clips.
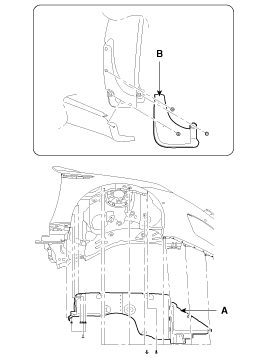
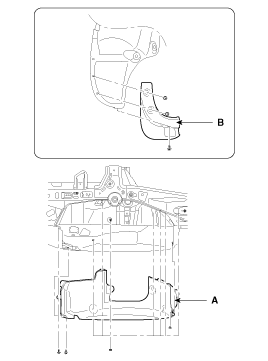
Front Wheel Guard And Mud Guard Replacement
•
When prying with a flat-tip screwdriver, wrap it with
protective tape, and apply protective tape around the related parts, to
prevent damaged
•
Put on gloves to protect your hands.
•
Take care not to scratch the body surface.
1.
Remove the front tire.
2.
After loosening the mounting clips and screws, then remove the front wheel guard (A), mud guard (B).
3.
Installation is the reverse of removal.
•
Replace any damaged clips.
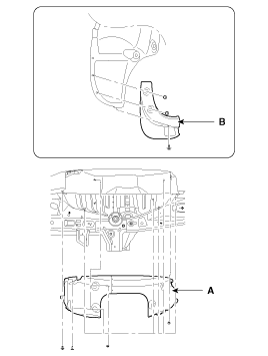
Rear Wheel Guard And Mud Guard Replacement
•
When prying with a flat-tip screwdriver, wrap it with
protective tape, and apply protective tape around the related parts, to
prevent damaged
•
Put on gloves to protect your hands.
•
Take care not to scratch the body surface.
2.
After loosening the mounting clips and nut, then remove the rear wheel guard (A) and mud guard (B)
[RH]
[LH]
3.
Installation is the reverse of removal.
•
Replace any damaged clips.
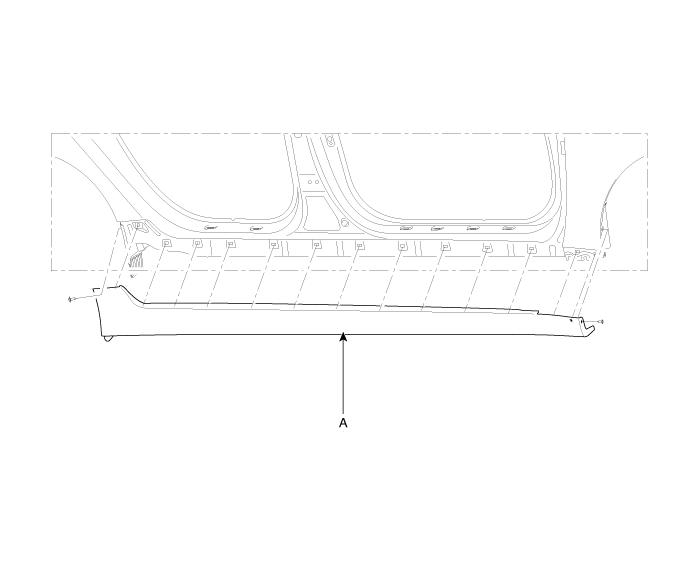
Side Sill Moulding Replacement
•
When prying with a flat-tip screwdriver, wrap it with
protective tape, and apply protective tape around the related parts, to
prevent damage.
•
Put on gloves to protect your hands.
•
Take care not to scratch the body surface.
1.
Loosen the mounting screws.
2.
Using a screwdriver or remover, remove the side sill moulding (A).
3.
Installation is the reverse of removal.
•
Replace any damaged clips
Replacement Door Trim Replacement • Be careful not to scratch the door trim and other parts. • Put on gloves to protect your hands. 1. After loosening the mounting screws, then remove ...
Components 1. Roof moulding [RH]2. Roof moulding [LH]3. Movable glass4. Cover [RH]5. Wind deflector assembly6. Front cover assembly7. Panoramaroof frame assembly8. Cover [LH]9. Shield cover10. Wind deflector ...
Other information:
Components 1. Rear carrier assembly2. Parking brake assembly3. Rear hub assembly4. Rear brake disc ...
Inspection 1. Turn ignition switch OFF. 2. Remove the air duct (A). Tightening torque: 7.8 ~ 9.8 N.m (0.8 ~ 1.0 kgf.m, 5.8 ~ 7.2 lb-ft) 3. Remove the air cleaner assembly. (1) Disconnect the breather hose (A). (2) Disconnect the air intake hose (B) and then remove the air cleaner assembly (C). Tightening ...
© 2025 Copyright www.koptimatfhev.com

 Rear Door Repair procedures
 Panoramaroof Components and Components Location