Kia Optima Hybrid: Seat Electrical / Air Ventilation Seat Repair procedures
Kia Optima Hybrid (TF HEV) 2016-2020 Service Manual / Body Electrical System / Seat Electrical / Air Ventilation Seat Repair procedures
| Removal |
[Front Seat]
| 1. |
Remove the front seat assembly.
(Refer to Body group - "Front Seat") |
| 2. |
Remove the seat back cover and cushion cover.
(Refer to Body group - "Front Seat") |
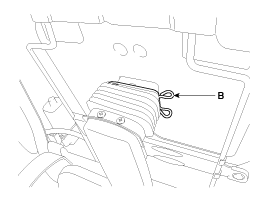
| 3. |
Remove the ventilation duct (A) after loosening screws and removing fixing hook (B).
|

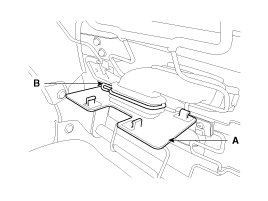
| 4. |
Remove the air ventilation panel (A) and fixing clip (B) from seat cushion.
|
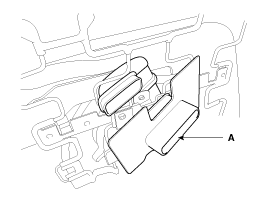
| 5. |
Remove the climate blower and duct (A) after loosening the fixing clips and screws.
|

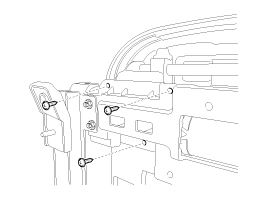
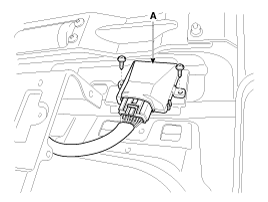
| 6. |
Remove the air ventilation control unit mounting screws.
|
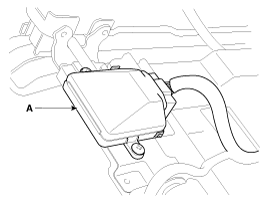
| 7. |
Disconnect the connector and remove the air ventilation control unit.
[Driver]
[Passenger]
|
| Installation |
[Front Seat]
| 1. |
Install the connectors and air ventilation control unit. |
| 2. |
Install the air ventilation duct and blower. |
| 3. |
Install the seat back cover. |
| 4. |
Install the seat assembly and seat track cover. |
 Air Ventilation Seat Description and Operation
Description Using the blows power of FAN on seat, remove the moisture, sweat and warmth from occupants and surface of seats. It inhales the indoor air through the blower installed at the seat cushion lower ...
 Fuel Filler Door
...
Other information:
Kia Optima Hybrid (TF HEV) 2016-2020 Service Manual: Input Speed Sensor Specifications
Specifications Type: Hall effect sensor Operation condition (°C)°F((-)40 ~ 150)) -40 ~ 302Air gap(mm)in.(0.95~1.65) 0.037 ~ 0.065 Output voltage(V)High1.18 ~ 1.68Low0.59 ~ 0.84 ...
Kia Optima Hybrid (TF HEV) 2016-2020 Service Manual: Front Washer Motor Repair procedures
Inspection 1. With the washer motor connected to the reservoir tank, fill the reservoir tank with water. Before filling the reservoir tank with water, check the filter for foreign material or contamination. if necessary, clean the filter. 2. Connect positive (+) battery cables to terminal ...
© 2025 Copyright www.koptimatfhev.com