Kia Optima Hybrid: Cooling System / Active Air Flap(AAF) Schematic Diagrams
| Schematic Diagram |

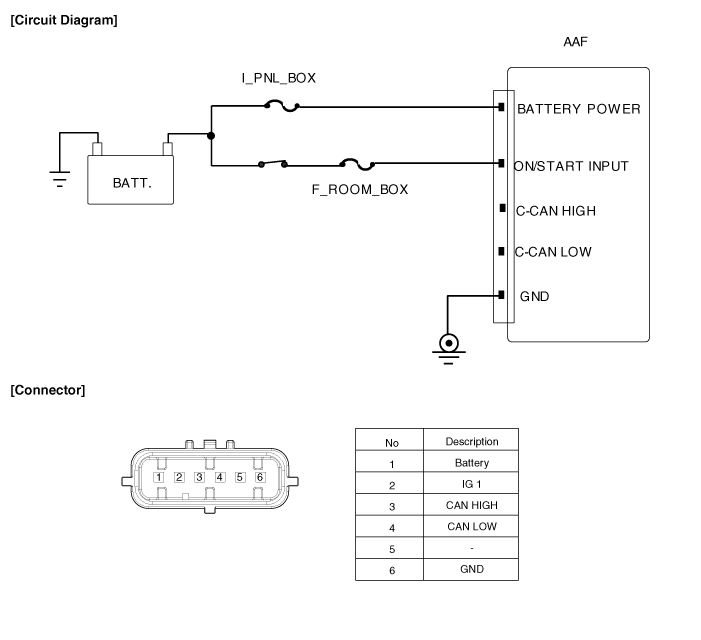
| Circuit Diagram |
 Active Air Flap(AAF) Components and Components Location
Components 1. Air duct2. Cover3. Actuator assembly4. Loader5. Flaps6. Link7. Housing ...
 Active Air Flap(AAF) Repair procedures
Removal 1. Remove the front bumper. (Refer to BD group - "Front bumper") 2. Remove the headlamps. (Refer to BE group - "Headlamps") 3. Remove the air guards (A). 4. Unfasten the 2 bolts (A) and 2 fasteners ...
Other information:
Kia Optima Hybrid (TF HEV) 2016-2020 Service Manual: High Voltage Shut-off Procedures
High Voltage Shut-off Procedures Be sure to read and follow the “General Safety Information and Caution” before doing any work related with the high voltage system. Failure to follow the safety instructions may result in serious electrical injuries. • High voltage components: ...
Kia Optima Hybrid (TF HEV) 2016-2020 Service Manual: Front Stabilizer Bar Repair procedures
Replacement 1. Remove the front wheel & tire. Tightening torque: 88.3 ~ 107.9N.m(9.0 ~ 11.0kgf.m, 65.1~79.6lb-ft) Be careful not to damage to the hub bolts when removing the front wheel & tire. 2. Loosen the bolt (A) and then disconnect the universal joint assembly from the pinion ...