Kia Optima Hybrid: Cooling System / Active Air Flap(AAF) Repair procedures
| Removal |
| 1. |
Remove the front bumper. (Refer to BD group - "Front bumper") |
| 2. |
Remove the headlamps. (Refer to BE group - "Headlamps") |
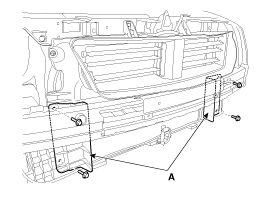
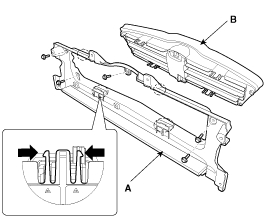
| 3. |
Remove the air guards (A).
|
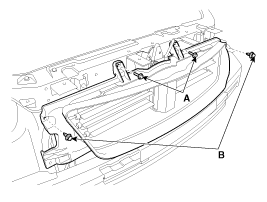
| 4. |
Unfasten the 2 bolts (A) and 2 fasteners (B).
|
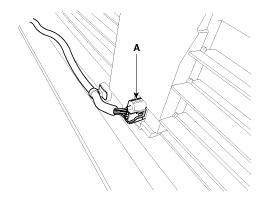
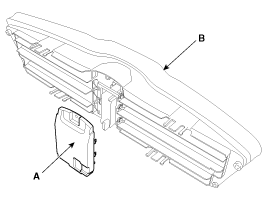
| 5. |
Disconnect the AAF (Active air flap) actuator connector (A).
|
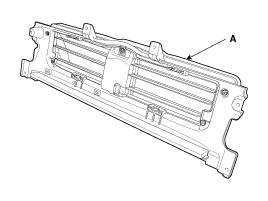
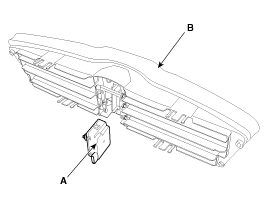
| 6. |
Remove the AAF (Active air flap) assembly (A).
|
| 7. |
Installation is the reverse of removal. |
| Disassembly |
| 1. |
Separate the duct (A) from the AAF (Active air flap) (B).
|
| 2. |
Remove the actuator cover (A) from the housing (B).
|
| 3. |
Remove the actuator (A) from the housing (B).
|
| 4. |
Remove the link (A) and flaps (B) from the housing (C).
|

| 5. |
Assembly is the reverse of disassembly. |
When assembling, the link and flaps should be in full open position. |

 Active Air Flap(AAF) Schematic Diagrams
Schematic Diagram Circuit Diagram ...
 Active Air Flap(AAF) Troubleshooting
Troubleshooting SymptomsPossible CausesRemedyWarning illuminated"Check active air flap system"Active Air Flap System Fail(Flap stuck)• Inspect the flap and remove the foreign substance• Check the Active ...
Other information:
Kia Optima Hybrid (TF HEV) 2016-2020 Service Manual: Fender Repair procedures
Replacement • Be careful not to damage the fender and body. • When removing the clips, use a clip remover. 1. Remove the front bumper. (Refer to the BD group - "Front Bumper") 2. Loosen the mud guard mounting screws. 3. After loosening the mounting screws and clips, then remove the ...
Kia Optima Hybrid (TF HEV) 2016-2020 Service Manual: Troubleshooting
Troubleshooting SymptomSuspect areaEngine will not start or struggle to startVapor hose damaged or disconnectedEngine struggles to startMalfunction of the Purge Control Solenoid ValveRough idle or engine stallsVapor hose damaged or disconnectedMalfunction of the PCV valveRough idleMalfunction of the ...