Kia Optima Hybrid: Seat & Power Seat / Rear Seat Repair procedures
Kia Optima Hybrid (TF HEV) 2016-2020 Service Manual / Body (Interior and Exterior) / Seat & Power Seat / Rear Seat Repair procedures
| Replacement |
Seat Assembly Replacement
| 1. |
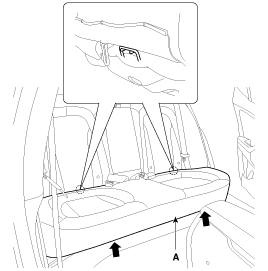
Remove the rear seat cushion (A).
|
| 2. |
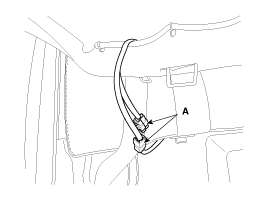
Disconnect the rear seat heater connectors (A).
|
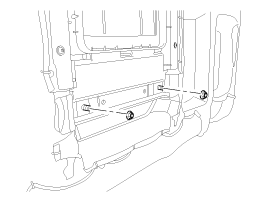
| 3. |
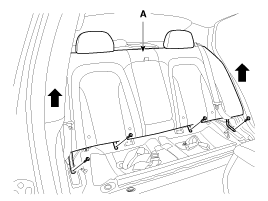
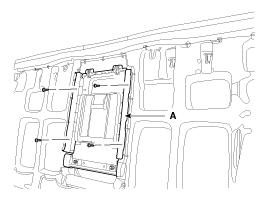
After loosening the mounting bolts, then remove the rear seat back (A).
|
| 4. |
Installation is the reverse of removal.
|

Rear Seat Back Cover Replacement
|
| 1. |
Remove the rear seat assembly. |
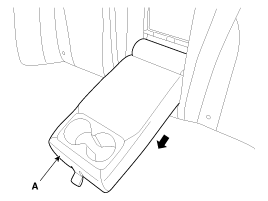
| 2. |
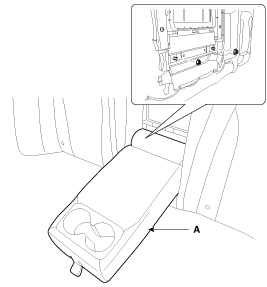
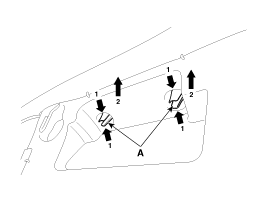
After loosening the mounting nuts, then remove the rear back armrest (A).
|
| 3. |
After loosening the mounting screws, then remove the rear back armrest board (A),
|
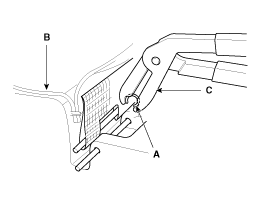
| 4. |
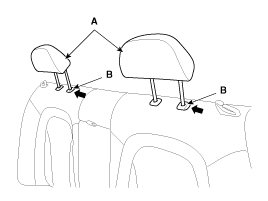
Push the lock pin (B), remove the headrest (A).
|
| 5. |
Pull out the headrest guides (A) while pinching the end of the guides, and remove them.
|
| 6. |
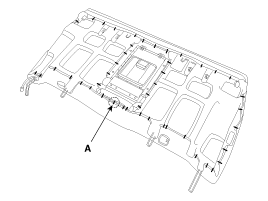
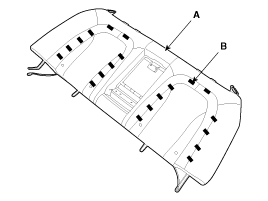
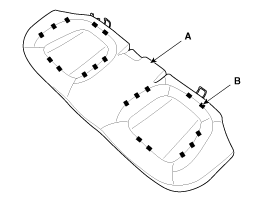
Remove the hog-ring clips (A).
|
| 7. |
Disconnect the hog-ring clips (B) on the rear of seat back, remove the seat back cover (A).
|
| 8. |
Installation is the reverse of removal.
|
Rear Seat Cushion Cover Replacement
|
| 1. |
Remove the rear seat cushion. |
| 2. |
Remove the hog-ring clips (A).
|
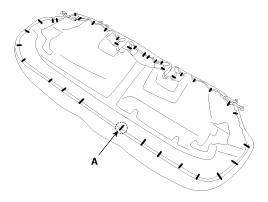
| 3. |
Disconnect the hog-ring clips (B) on the rear of seat cushion, remove the seat cushion cover (A).
|
| 4. |
Installation is the reverse of removal.
|
Rear Back Armrest Replacement
| 1. |
Remove the rear seat back assembly. |
| 2. |
Loosen the rear back armrest mounting nuts.
|
| 3. |
Remove the rear back armrest (A).
|
| 4. |
Installation is the reverse of removal. |
 Rear Seat Components and Components Location
Components - 1 [ General ] 1. Headrest2. Headrest guide3. Rear seat back cover4.Rear seat back frame assembly5. Rear back armrest board6. Rear seat cushion cover7. Rear back armrest8. Rear seat cushion ...
 Seat Belt
...
Other information:
Kia Optima Hybrid (TF HEV) 2016-2020 Service Manual: Audio Remote Control Schematic Diagrams
Circuit Diagram ...
Kia Optima Hybrid (TF HEV) 2016-2020 Service Manual: Front Bumper Repair procedures
Replacement • Put on gloves to protect your hands. • Use a plastic panel removal tool to remove interior trim pieces to protect from marring the surface. • Take care not to bend or scratch the cover and other parts. 1. After loosening the mounting bolts and clips, then remove the ...
© 2025 Copyright www.koptimatfhev.com