Kia Optima Hybrid: Bumper / Rear Bumper Repair procedures
| Replacement |
|
| 1. |
Remove the trunk trim.
(Refer to the BD group - "Trunk Trim") |
| 2. |
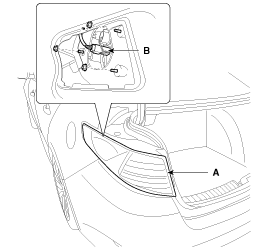
Disconnect the connector (B), and then loosen the rear combination lamp mounting nuts. |
| 3. |
Remove the rear combination lamp (A).
|
| 4. |
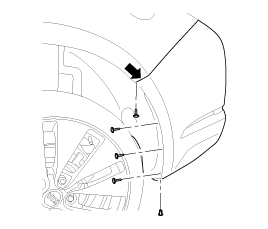
After loosening the rear bumper side''s mounting clips and screw, then disconnect the side''s.
|
| 5. |
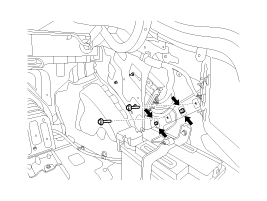
Loosen the trunk inner mounting bolts.
|
| 6. |
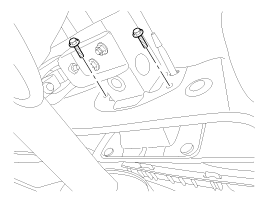
Loosen the mounting bolts.
|
| 7. |
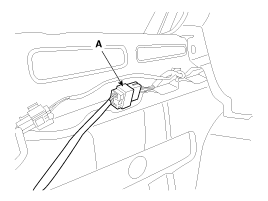
Disconnect the rear bumper main connector (A).
|
| 8. |
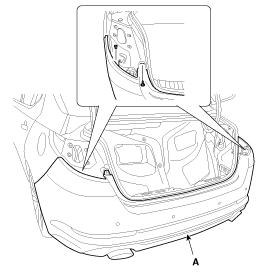
After loosening the mounting screw and clip, then remove the rear bumper cover (A).
|
| 9. |
Installation is the reverse of removal.
|
 Rear Bumper Components and Components Location
Components(1) 1. Rear bumper cover2. Rear under cover assembly Components(2) 1. Rear bumper cover2. Rear reflector3. Rear bumper lower cover4. Rear bumper energy absorber5. Wiring harness6. Rear bumper ...
Other information:
Kia Optima Hybrid (TF HEV) 2016-2020 Service Manual: Description and Operation
Description Regeneration Brake System During deceleration or braking of an electric vehicle or HEV, the drive motor acts as an alternator and charges the battery by converting the vehicle’s kinetic energy generated during braking into electrical energy. Regenerative braking amount depends on the vehicle ...
Kia Optima Hybrid (TF HEV) 2016-2020 Service Manual: Repair procedures
Diagnosis With GDS 1. BSD system defects can be quickly diagnosed with the GDS. GDS operates actuator quickly to monitor, input/output value and self diagnosis. 2. Connect the cable of GDS to the data link connector in driver side crash pad lower panel, turn the power on GDS. 3. Select the vehicle model ...


