Kia Optima Hybrid: Exterior / Hood Repair procedures
| Replacement |
|

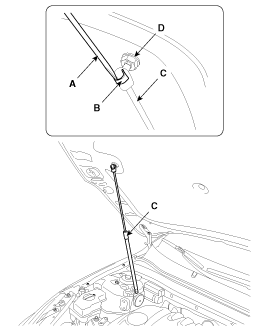
| 1. |
Using a screwdriver, lift the socket clips (A) up slightly on both ends of the lifter (B).
|
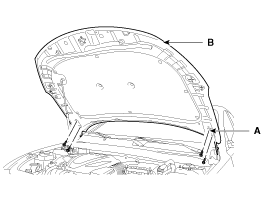
| 2. |
After loosening the hood hinge (A) mounting bolts, remove the hood panel (B).
|
| 3. |
Installation is the reverse of removal.
|

| 1. |
Using a clip remover, detach the clips, and remove the hood insulator pad (A).
|
| 2. |
Installation is the reverse of removal.
|
| 1. |
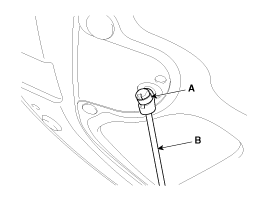
Using a screwdriver (A), lift the socket clips (B) up
slightly on both ends of the lifter (C), and then remove the lifter from
the bracket (D).
|
| 2. |
Installation is the reverse of removal. |
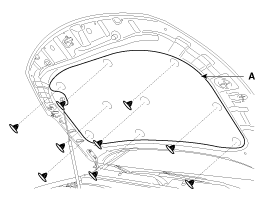
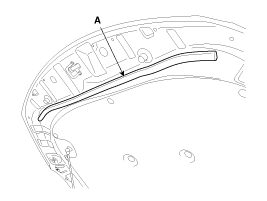
| 1. |
Detach the clips, then remove the hood seal weatherstrip (A).
|
| 2. |
Installation is the reverse of removal.
|
| 1. |
Remove the hood weatherstrip (A).
|
| 2. |
Installation is the reverse of removal. |
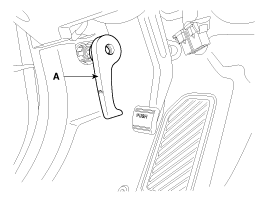
| 1. |
Using a screwdriver or remover, remove the hood release handle (A).
|
| 2. |
Installation is the reverse of removal.
|
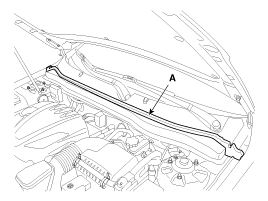
| 1. |
After loosening the mounting clips and bolts, then remove the rediator upper cover (A).
|

| 2. |
Detach the clips, then remove hood latch cover (A).
|
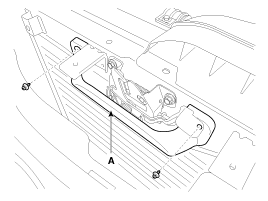
| 3. |
Remove the hood latch (A) mounting bolts.
|
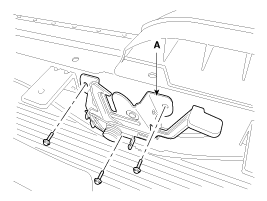
| 4. |
Disconnect the hood latch cable (A) and remove the hood latch (B).
|
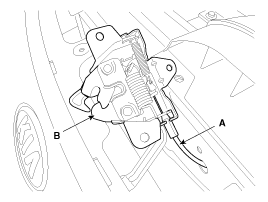
| 5. |
Installation is the reverse of removal.
|
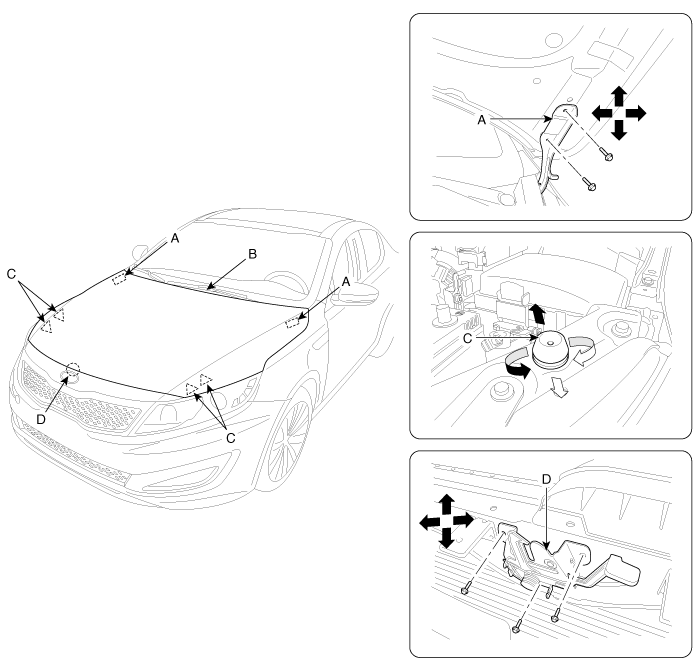
| Adjustment |
| 1. |
After loosening the hinge (A) mounting bolt, adjust the hood (B) by moving it up or down, or right or left. |
| 2. |
Adjust the hood height by turning the hood overslam bumpers (C). |
| 3. |
After loosening the hood latch (D) mounting bolts, adjust the latch by moving it up or down, or right or left.
|
 Fender Repair procedures
Replacement • Be careful not to damage the fender and body. • When removing the clips, use a clip remover. 1. Remove the front bumper. (Refer to the BD group - "Front Bumper") 2. Loosen ...
 Trunk Lid Repair procedures
Replacement Trunk Lid Assembly Replacement • When removing and installing the trunk lid, an assistant is necessary. • Wear gloves to protect hands from injury. 1. Loosen the trunk inside ...
Other information:
Kia Optima Hybrid (TF HEV) 2016-2020 Service Manual: Repair procedures
On-vehicle Inspection • Check that the auxiliary 12V battery cables are connected to the correct terminals. • Disconnect the auxiliary 12V battery cables when the battery is given a quick charge. • Never disconnect the auxiliary 12V battery while the engine is running. Check The Auxiliary ...
Kia Optima Hybrid (TF HEV) 2016-2020 Service Manual: Troubleshooting
Troubleshooting Fault Diagnosis Features a fail-safe mechanism that prevents dangerous situations from developing in the event of a transaxle failure. The limp home mode engages if the transaxle malfunctions. In this mode, the transaxle operates at a minimal functionality level, making it possible for ...