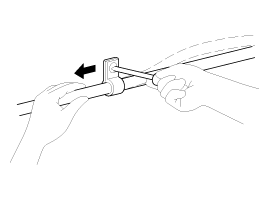
Kia Optima Hybrid: General Information / General Information
Kia Optima Hybrid (TF HEV) 2016-2020 Service Manual / General Information / General Information
| Identification Number Locations |
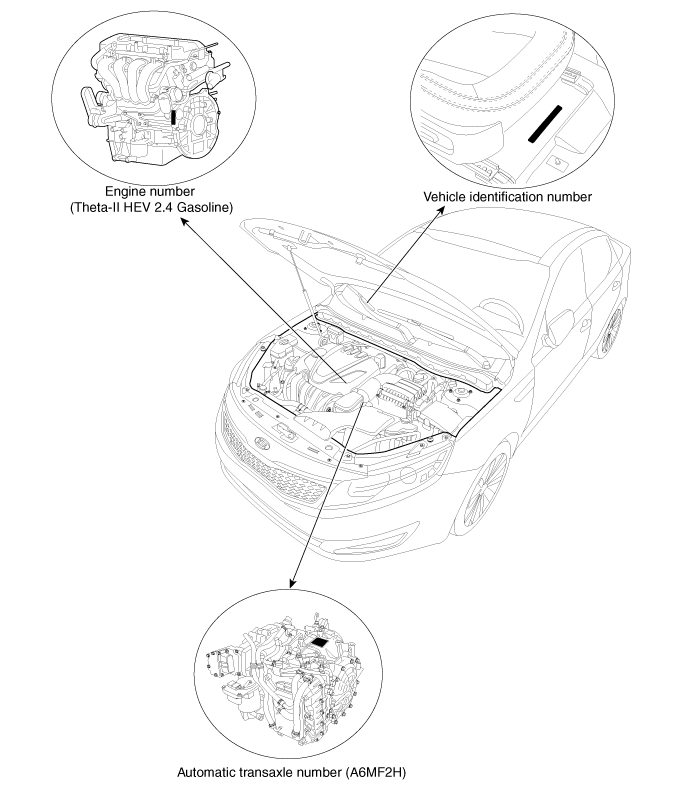
Identification Number Description
Vehicle Identification Number
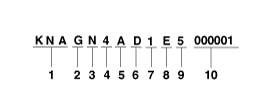
| 1. |
World Manufacturer Identifier (WMI)
- KNA : Passenger vehicle, MPV(Multipurpose Passenger Vehicle)/SUV(Sports Utility Vehicle)/RV(Recreational Vehicle) |
| 2. |
Vehicle line
- G : OPTIMA |
| 3. |
Model & Series
- L : Low grade (L)
- M : Middle-Low grade (GL)
- N : Middle grade (GLS, JSL, TAX)
- P : Middle-High grade (HGS)
- R : High grade (TOP) |
| 4. |
Body/Cabin type, Gross Vehicle Weight Rating
- 4 : Sedan - 4 door |
| 5. |
Restraint system, Brake system
| ||||||||||||||||||||||||||||||||||||||||||||||||||||||||||||||||||||||||||||||||||||||||||||||||||||||||||||||||||||||||||||||||||
| 6. |
Engine type
- D : Gasoline engine 2.4 (Theta-II) + HEV |
| 7. |
Check digit or Driver’s side & Transmission
- Check digit : 0 ~ 9, ? |
| 8. |
Production year
- D : 2013, E : 2014, F : 2015, G : 2016 … |
| 9. |
Plant of production
- 5 : Hwasung (Korea) |
| 10. |
Vehicle production sequence number
- 000001 ~ 999999 |
Paint Code
| Code | Color |
| SWP | Snow White Pearl |
| 3D | Bright Silver |
| ABP | Aurora Black pearl |
| B3U | Smokey Blue |
| C3S | Aluminum Silver |
Engine Number
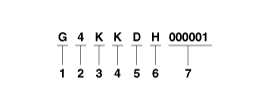
| 1. |
Engine fuel
- G : Gasoline |
| 2. |
Engine range
- 4 : 4 cycle 4 cylinder |
| 3. |
Engine development order and capacity
- K : Theta engine (Gasoline) |
| 4. |
Engine Capacity
- K : 2359cc (Theta-II HEV engine) |
| 5. |
Production year
- D : 2013, E : 2014, F : 2015, G : 2016 … |
| 6. |
Plant of production
- A : Asan (Korea)
- B : Beijing (China)
- H : Hwasung (Korea)
- K : Montgomery (U.S.A)
- M : Chennai (India)
- P : Poseung (Korea)
- S : Sohari (Korea)
- T : Izmit (Turkey)
- U : Ulsan (Korea)
- W : Shandong (China)
- Z : Zilina (Slovakia)
- 1 : Yancheng (China) |
| 7. |
Engine production sequence number
- 000001 ~ 999999 |
Transaxle Number
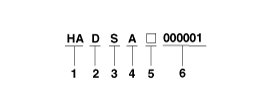
| 1. |
Model
- HA : A6MF2H (Theta-II 2.4 HEV) |
| 2. |
Production year
- D : 2013, E : 2014, F : 2015, G : 2016 … |
| 3. |
Final gear ratio
- S : 3.320 |
| 4. |
Detailed classification
- A : Theta-II 2.4 HEV |
| 5. |
Spare |
| 6. |
Transaxle production sequence number
- 000001~999999 |
Warning / Caution Label Locations
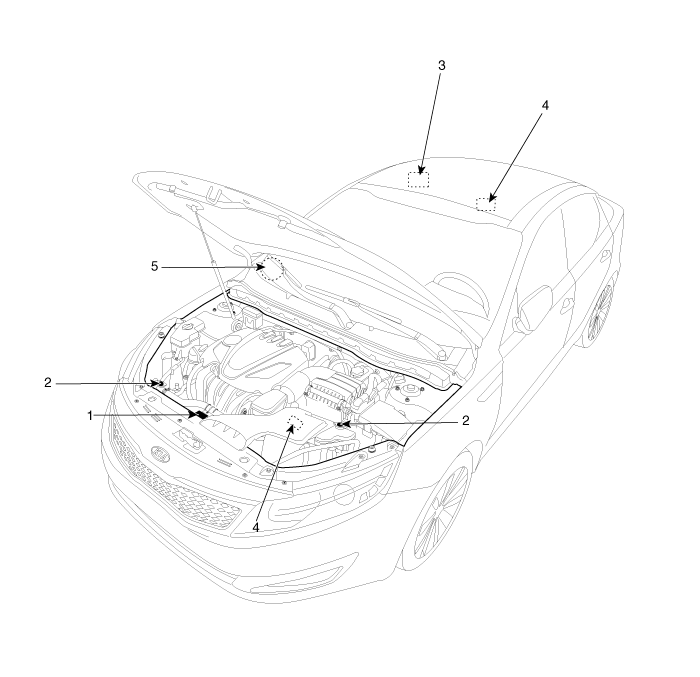
| 1. Fan caution 2. Radiator cap caution | 3. Auxiliary 12V battery caution 4. High voltage caution 5. High voltage battery caution |
Auxiliary 12V battery Caution Label Description
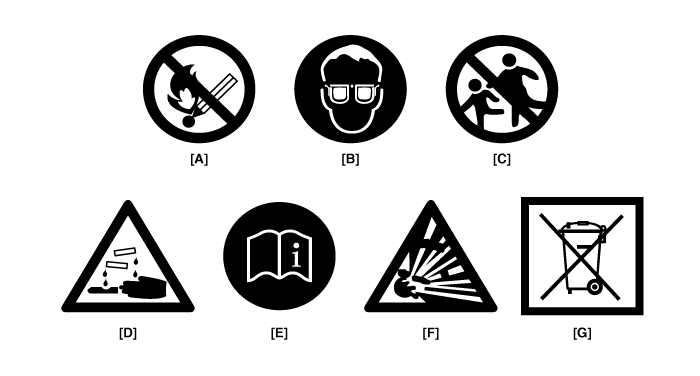
Warning / Caution Label (Cont''d)
| A. Keep lighted cigarettes and all other flames or sparks away from the battery. |
| B. Wear eye protection when charging or working near a battery. Always provide ventilation when working in an enclosed space.
|
| C. Keep batteries out of the reach of children because batteries contain highly corrosive SULFURIC ACID. Do not allow battery acid to contact your skin, eyes, clothing or paint finish. |
| D. If any electrolyte gets into your eyes, flush your eyes with clean water for at least 15 minutes and get immediate medical attention. If possible, continue to apply water with a sponge or cloth until medical attention is received. If electrolyte gets on your skin, throughly wash the contacted area. If you feel a pain or a burning sensation, get medical attention immediately. |
| E. Always read the following instructions carefully when handing a battery. |
| F. Hydrogen, which is a highly combustible gas, is always presents in battery cells and may explode if ignited. |
| G. An improperly disposed battery can be harmful to the environment and human health. Always confirm local regulations for battery disposal. |
Handling And Storage The Auxiliary 12V Battery
| Battery Itself |
| ||||||
| Battery on Vehicle |
|
After reconnecting or recharging a discharged battery, the ESC OFF indicator may illuminate.
In this case, turn the handle half way to the left and right whilst the ignition switch is in the ON position.
Then, restart the engine after the ignition is OFF.
The ESC OFF indicator may turn OFF.
If the ESC OFF indicator does not turn OFF, have the system checked refering to DTC. |
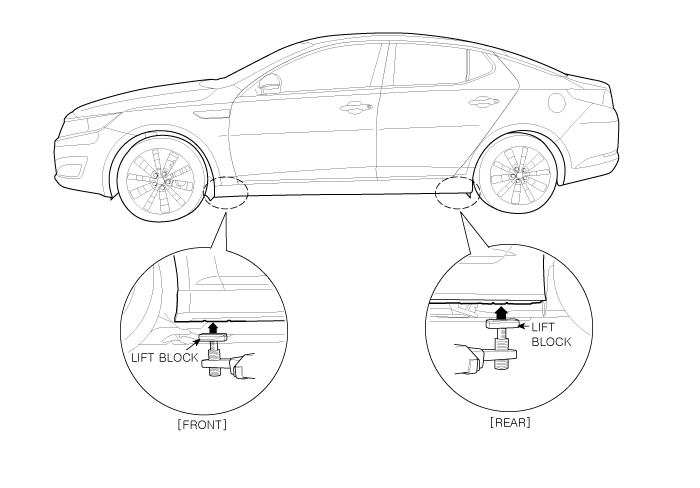
Lift And Support Points
When heavy rear components such as suspension, fuel tank,
spare tire, tailgate and trunk lid are to be removed, place additional
weight in the luggage area before hoisting. When substantial weight is
removed from the rear of the vehicle, the center of gravity may change
and can cause the vehicle to tip forward on the hoist. |
|
| 1. |
Place the lift blocks under the support points as shown in the illustration. |
| 2. |
Raise the hoist a few inches (centimeters) and rock the vehicle to be sure it is firmly supported. |
| 3. |
Raise the hoist to full height to inspect the lift points for secure support.
|
Towing
If the vehicle needs to be towed, call a professional towing
service. Never tow vehicle with just a rope or chain. It is very
dangerous.
Emergency Towing
There are three popular methods of towing a vehicle :
| – |
The operator loads the vehicle on the back of truck. This is best way of transporting the vehicle. |
| – |
The tow truck uses two pivoting arms that go under the tires
of the driving axle and lift them off the ground. The other two wheels
remain on the ground. |
| – |
The tow truck uses metal cables with hooks on the ends. These
hooks go around parts of the frame or suspension, and the cables lift
that end of the vehicle off the ground. The vehicle''s suspension and
body can be seriously damaged if this method of towing is attempted.
If the vehicle cannot be transported by flat-bed, should be
towed with the wheels of the driving axle off the ground and do the
following : |
Manual Transaxle
| • |
Release the parking brake. |
| • |
Shift the Transaxle to neutral |
Automatic Transaxle
| • |
Release the parking brake. |
| • |
Start the engine. |
| • |
Shift to [D] position, then [N] position. |
| • |
Turn off the engine. |
|
Meaning Of Symbols
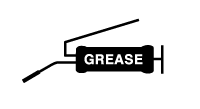
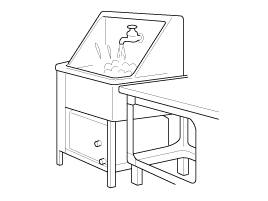
There are five primary symbols used to complement
illustrations. These symbols indicate the part to apply such materials
during service.
| Symbol | Meaning |
| Do not reuse the part. Replace a new one. |
| Apply engine oil or transmission oil to the part. |
| Apply automatic transmission fluid (ATF) to the part. |
| Apply grease to the part. |
| Apply sealant to the part. |
General Service Information
Protection Of The Vehicle
Always be sure to cover fenders, seats, and floor areas before starting work.
The support rod must be inserted into the hole near the edge
of the hood whenever you inspect the engine compartment to prevent the
hood from falling and causing possible injury.
Make sure that the support rod has been released prior to
closing the hood. Always check to be sure the hood is firmly latched
before driving the vehicle. |
Preparation Of Tools And Measuring Equipment
Be sure that all necessary tools and measuring equipment are available starting work.
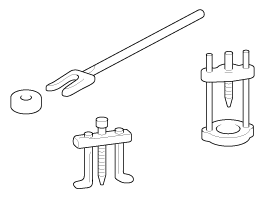
Special Tools
Use special tools when they are required.
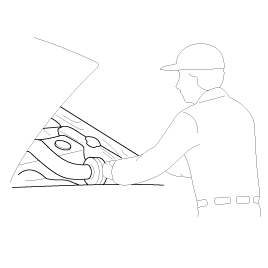
Removal Of Parts
First find the cause of the problem and then determine whether removal or disassembly before starting the job.
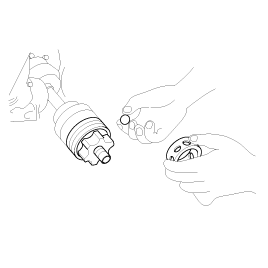
Disassembly
If the disassembly procedure is complex, requiring many parts
to be disassembled, all parts should be disassembled in a way that will
not affect their performance or external appearance.
| 1) |
Inspection of parts
Each part, when removed, should be carefully on suspected for malfunction, deformation, damage, and other problems.
|
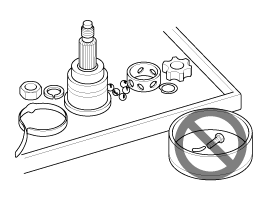
| 2) |
Arrangement of parts
All disassembled parts should be carefully arranged for effective reassembly.
Be sure to separate and correctly identify the parts to be replaced from those that will be used again.
|
| 3) |
Cleaning parts for reuse
All parts to be used again should be carefully and thoroughly cleaned by an appropriate method.
|
Parts
When replacing parts, use KIA MOTORS genuine parts.

Replacement
Standard values, such as torques and certain adjustments, must be strictly observed in the reassembly of all parts.
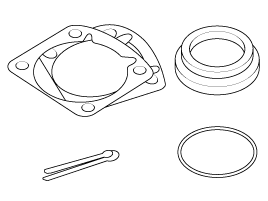
If removed, the following parts should always be replaced with new ones.
| 1) |
Oil seals |
| 2) |
Gaskets |
| 3) |
O-rings |
| 4) |
Lock washers |
| 5) |
Cotter pins (split pins) |
| 6) |
Plastic nuts
Depending on their location. |
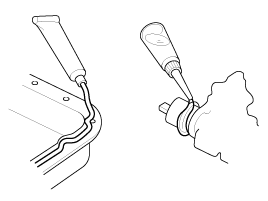
| 7) |
Sealant should be applied to gaskets. |
| 8) |
Oil should be applied to the moving components of parts. |
| 9) |
Specified oil or grease should be applied to the prescribed locations (oil seals, etc) before assembly.
|
Adjustment
Use gauges and testers to adjust correctly the parts to standard values correctly.
Electrical System
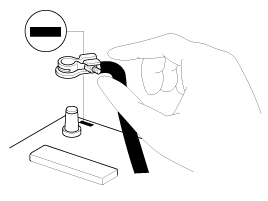
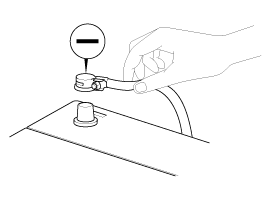
| 1. |
Be sure to disconnect the battery cable from the negative (-) terminal of the battery. |
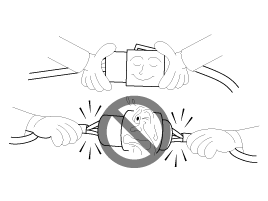
| 2. |
Never pull on the wires when disconnecting connectors. |
| 3. |
Locking connectors will click when the connector is secure. |
| 4. |
Handle sensors and relays carefully. Be careful not to drop them against other parts.
|
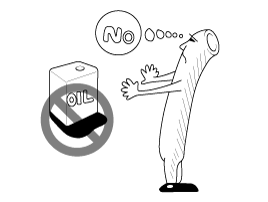
Rubber Parts And Tubes
Always prevent gasoline or from touching rubber parts or tubing.
Measuring Body Dimensions
| 1. |
Basically, all measurements in this manual are taken with a tracking gauge. |
| 2. |
When a measuring tape is used, check to be sure there is no elongation, twisting or bending. |
| 3. |
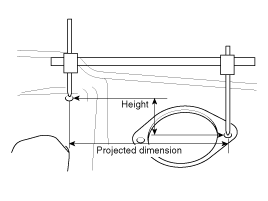
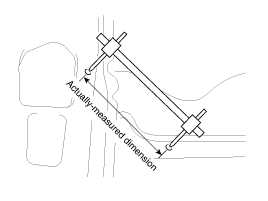
For measuring dimensions, both projected dimensions and actual - measurement dimensions are used in this manual. |
Dimensions Projected
| 1. |
These are the dimensions measured when the measurement points
are projected from the vehicle''s surface, and are the reference
dimensions used for used for body alterations. |
| 2. |
If the length of the tracking gauge probes is adjustable,
measure it by lengthening one of two probes as long as the different
value in height of the two surface.
|
Measuring Actual Dimensions
| 1. |
These dimensions indicate the actual linear distance between
measurement points, and are used as the reference dimensions when a
tracking gauge is used for measurement. |
| 2. |
First adjust both probes to the same length (A=A'') before measurement.
|
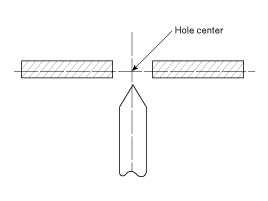
Measurement Point
Measurements should be taken at the center of the hole.
Checking Cables And Wires
| 1. |
Check the terminal for tightness. |
| 2. |
Check terminals and wires for corrosion from battery electrolyte, etc. |
| 3. |
Check terminals and wires for open circuits. |
| 4. |
Check wire insulation and coating for damage, cracks and degrading. |
| 5. |
Check the conductive parts of terminals for contact with other metallic parts (vehicle body and other parts). |
| 6. |
Check grounded parts to verify that there is complete continuity between their attaching bolt(s) and the vehicle''s body. |
| 7. |
Check for incorrect wiring. |
| 8. |
Check that the wiring is so clamped to the prevent contact
with sharp corners of the vehicle body, etc. or hot parts (exhaust
manifold, etc.) |
| 9. |
Check that the wiring is clamped firmly to provide enough
clearance from the fan pulley, fan belt and other rotating or moving
parts. |
| 10. |
Check that the wiring has a little space so that it can
vibrate between fixed and moving parts such as the vehicle body and the
engine.
|
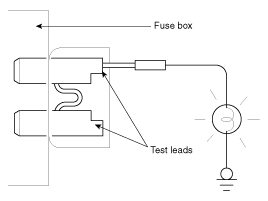
Check Fuses
A blade type fuse test taps provided to allow checking the
fuse itself without removing if from the fuse box. The fuse is good if
the test lamp lights up when one lead is connected to the test taps (one
at a time) and the other lead is grounded. (Turn the ignition switch so
that the fuse circuit becomes operative)
Servicing The Electrical System
| 1. |
Prior to servicing the electrical system, be sure to turn off the ignition switch and disconnect the battery ground cable.
|
| 2. |
Attach the wiring harnesses with clamps so that there is no
slack. However, for any harness which passes the engine or other
vibrating parts of the vehicle, allow some slack within a range that
does not allow the engine vibrations to cause the harness to come into
contact with any of the surrounding parts and then secure the harness by
using a clamp.
|
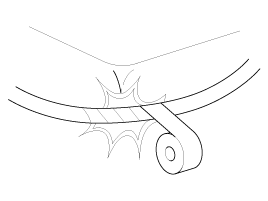
| 3. |
If any section of a wiring harness interferes with the edge
of a parts, or a corner, wrap the section of the harness with tape or
something similar in order to protect if from damage.
|
| 4. |
When installing any parts, be careful not to pinch or damage any of the wiring harness.
|
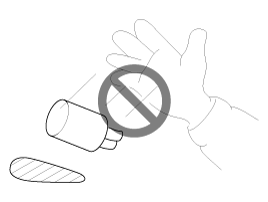
| 5. |
Never throw relays, sensors or electrical parts, or expose them to strong shock.
|
| 6. |
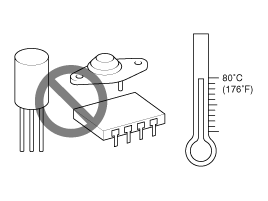
The electronic parts used in the computer, relays, etc. are
readily damaged by heat. If there is a need for service operations that
may cause the temperature to exceed 80°C (176°F), remove the
electronic parts before hand.
|
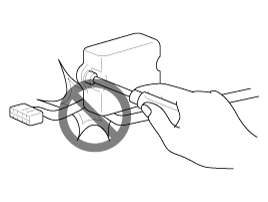
| 7. |
Loose connectors cause problems. Make sure that the connectors are always securely fastened.
|
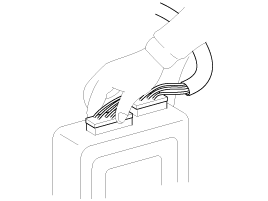
| 8. |
When disconnecting a connector, be sure to grip only the connector, not the wires.
|
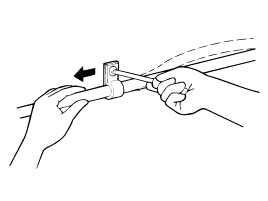
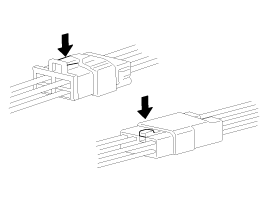
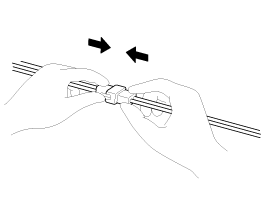
| 9. |
Disconnect connector which have catches by pressing in the direction of the arrows shown the illustration.
|
| 10. |
Connect connectors which have catches by inserting the connectors until they make a clicking sound.
|
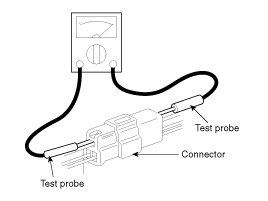
| 11. |
When using a circuit tester to check continuity or voltage on
connector terminals, insert the test probe into the harness side. If
the connector is a sealed connector, insert the test probe through the
hole in the rubber cap until contacts the terminal, being careful not to
damage the insulation of the wires.
|
| 12. |
To avoid overloading the wiring, take the electrical current
load of the optional equipment into consideration, and determine the
appropriate wire size.
| ||||||||||||||||||||||||||||||||||
Precautions For Catalytic Converter
If a large amount of unburned gasoline flows into the
converter, it may overheat and create a fire hazard. To prevent this
observe the following precautions and explain them to your customer. |
| 1. |
Use only unleaded gasoline. |
| 2. |
Do not run the engine while the car is at rest for a long
time. Avoid running the engine at fast idle for more than 10 minutes and
idle speed for more than 20 minutes. |
| 3. |
Do not measure engine compression for an extended time.
Engine compression tests must be made as rapidly as possible. Remove the
fuel pump relay before performing a compression test. |
| 4. |
Do not dispose of used catalytic converter together with parts contaminated with gasoline or oil. |
 High Voltage Shut-off Procedures
High Voltage Shut-off Procedures Be sure to read and follow the “General Safety Information and Caution” before doing any work related with the high voltage system. Failure to follow ...
Other information:
Kia Optima Hybrid (TF HEV) 2016-2020 Service Manual: Seat Belt Buckle Switch (BS) Description and Operation
Description The SRSCM shall monitor the status of the driver and front passenger seat belt buckle. The SRSCM provides one pin each for the driver and front passenger seat belt buckle status input. The seat belt buckle circuit operates from internal boost voltage supplied by the SRSCM, and uses chassis ...
Kia Optima Hybrid (TF HEV) 2016-2020 Service Manual: Electric Parking Brake (EPB) Components and Components Location
Components 1. EPB Unit2. EPB Switch3. Brake Caliper 4. EPB Warning Lamp5. AUTO HOLD Lamp ...
© 2025 Copyright www.koptimatfhev.com


