Kia Optima Hybrid: Interior / Crash Pad Repair procedures
| Replacement |
|

| 1. |
Using a screwdriver or remover, remove the crash pad side cover (A).
|
| 2. |
After loosening the mounting screws, then remove the crash pad lower panel (A).
|
| 3. |
Disconnect the connectors (A).
[LH]
[RH]
|
| 4. |
After loosening the mounting screws, then remove the crash pad garnish [LH] (A).
|
| 5. |
Using a screwdriver or remover, remove the crash pad garnish [RH] (A).
|
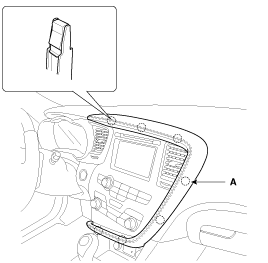
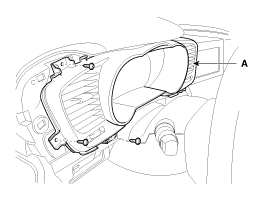
| 6. |
After loosening the mounting screws, then remove the cluster fascia panel (A).
|
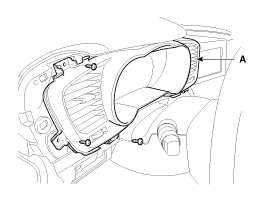
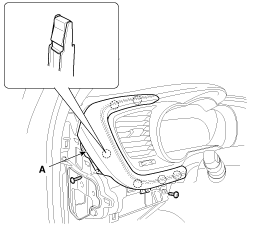
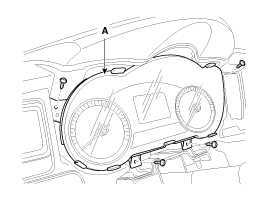
| 7. |
After loosening the mounting screws, then remove the cluster assembly (A).
|
| 8. |
Disconnect the connector (A).
|
| 9. |
Installation is the reverse of removal.
|

|
| 1. |
Using a screwdriver or remover, remove the crash pad side cover (A).
|
| 2. |
After loosening the mounting screws, then remove the crash pad lower panel (A).
|
| 3. |
Disconnect the connectors (A).
[LH]
[RH]
|
| 4. |
After loosening the mounting screws, then remove the crash pad garnish [LH] (A).
|
| 5. |
Using a screwdriver or remover, remove the crash pad garnish [RH] (A).
|
| 6. |
After loosening the mounting screws, then remove the cluster fascia panel (A).
|
| 7. |
After loosening the mounting screws, then remove the heater control unit (A).
|
| 8. |
Disconnect the connectors (A) and hose (B).
|
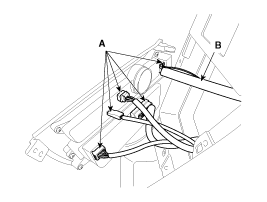
| 9. |
After loosening the mounting screws, then remove the center fascia upper panel (A).
|
| 10. |
Installation is the reverse of removal.
|
|
| 1. |
Using a screwdriver or remover, remove the crash pad side cover (A).
|
| 2. |
After loosening the mounting screws, then remove the crash pad lower panel (A).
|
| 3. |
Disconnect the connectors (A).
[LH]
[RH]
|
| 4. |
Installation is the reverse of removal.
|
|
| 1. |
Using a screwdriver or remover, remove the crash pad side cover (A).
|
| 2. |
After loosening the mounting screws, then remove the crash pad lower panel (A).
|
| 3. |
Disconnect the connectors (A).
[LH]
[RH]
|
| 4. |
After loosening the mounting screws, then remove the crash pad garnish [LH] (A).
|
| 5. |
Using a screwdriver or remover, remove the crash pad garnish [RH] (A).
|
| 6. |
After loosening the mounting screws, then remove the cluster fascia panel (A).
|
| 7. |
After loosening the mounting screws, then remove the heater control unit (A).
|
| 8. |
Disconnect the connectors (A) and hose (B).
|
| 9. |
After loosening the mounting screws, then remove the center fascia upper panel (A).
|
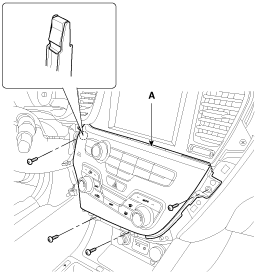
| 10. |
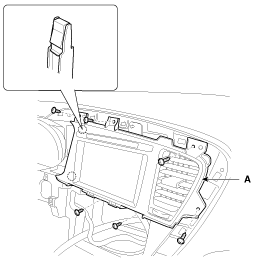
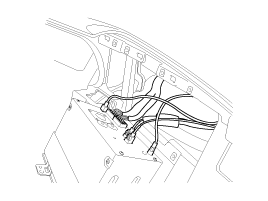
After loosening the mounting screws, then remove the audio assembly (A).
|

| 11. |
Disconnect the connectors.
|
| 12. |
Installation is the reverse of removal.
|
|
| 1. |
Using a screwdriver or remover, remove the crash pad side cover (A).
|
| 2. |
After loosening the mounting screws, then remove the crash pad lower panel (A).
|
| 3. |
Disconnect the connectors (A).
[LH]
[RH]
|
| 4. |
Using a screwdriver or remover, remove the crash pad garnish [RH] (A).
|
| 5. |
After loosening the mounting screws, then remove the heater control unit (A).
|
| 6. |
Disconnect the connectors (A) and hose (B).
|
| 7. |
Installation is the reverse of removal.
|
|
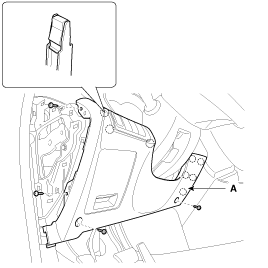
| 1. |
Using a screwdriver or remover, remove the crash pad side cover (A).
|
| 2. |
Disconnect the guide (B) from the glove box (A).
|
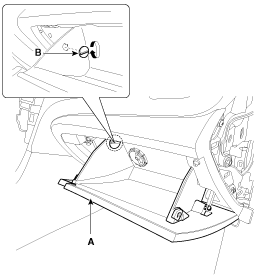
| 3. |
Disconnect the lift (A) from the glove box (B).
|
| 4. |
Disconnect the pin (A) and then remove the glove box (B).
|
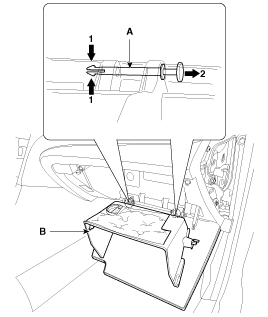
| 5. |
After loosening the mounting screw, then remove the passenger''s under cover (A).
|
| 6. |
After loosening the mounting screws, then remove the glove box housing (A).
|
| 7. |
Disconnect the connectors (A).
[LH]
[RH]
|

| 8. |
Installation is the reverse of removal.
|
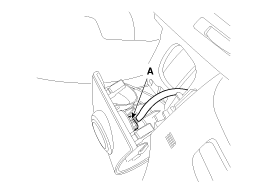
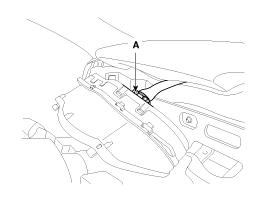
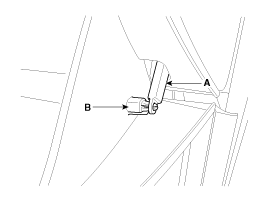
| 1. |
After loosening the mounting screws, then remove the shroud assembly (A).
|
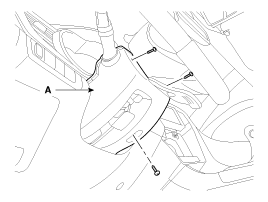
| 2. |
Installation is the reverse of removal. |
|
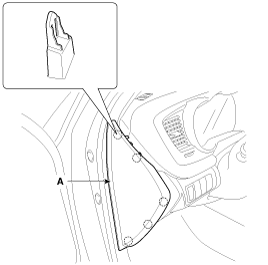
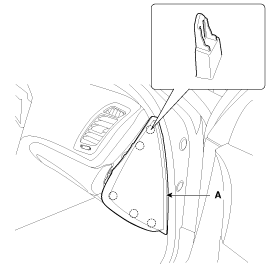
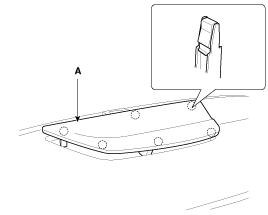
| 1. |
Using a screwdriver or remover, remove the crash pad side cover (A).
[Driver''s]
[Passenger''s]
|
| 2. |
Installation is the reverse of removal.
|
|
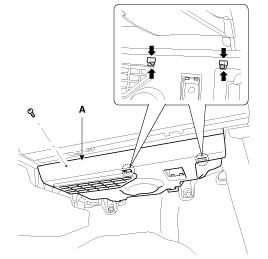
| 1. |
Remove the following items.
|
| 2. |
After loosening the mounting screws, then remove the center facia lower panel (A).
|
| 3. |
Using a screwdriver or remover, remove the center speaker grille (A).
|
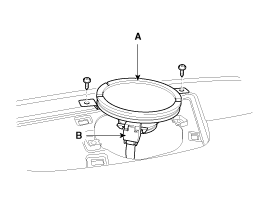
| 4. |
After loosening the mounting screws, then remove the center speaker (A). |
| 5. |
Disconnect the center speaker connector (B).
|
| 6. |
Disconnect the passenger`s airbag connector (A). |
| 7. |
Loosen the mounting bolts.
|
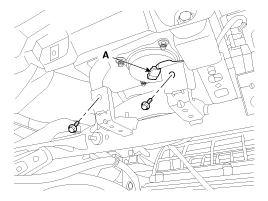
| 8. |
Using a screwdriver or remover, remove the photo sensor (A). |
| 9. |
Disconnect the photo sensor connector (B).
|
| 10. |
Disconnect the side speaker connector (A).
[LH]
[RH]
|

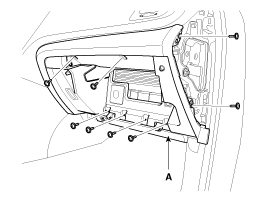
| 11. |
After loosening the mounting bolts and nuts, then remove the main crash pad assembly (A).
|
| 12. |
Installation is the reverse of removal.
|
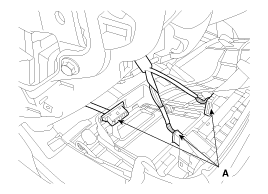
|
| 1. |
Remove the following items.
|
| 2. |
Disconnect the blower unit connectors.
(Refer to the HA group - "Air conditioning system, Heater, Blower") |
| 3. |
Disconnect the multi box connectors.
[Driver''s]
|
| 4. |
Disconnect the multi box connectors.
[Passenger''s]
|
| 5. |
Disconnect the passenger compartment junction box connectors.
|
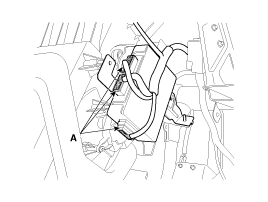
| 6. |
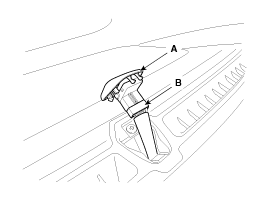
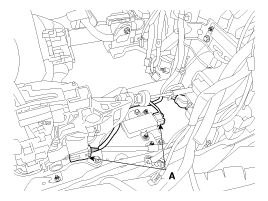
Disconnect the airbag control module (SRSCM) connectors (A).
|
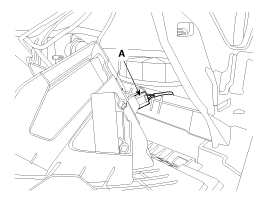
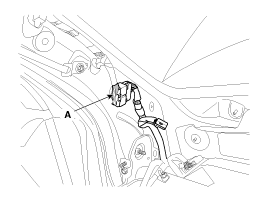
| 7. |
Disconnect the connector (A) and the mounting clips in the front pillar.
[Driver''s]
[Passenger''s]
|
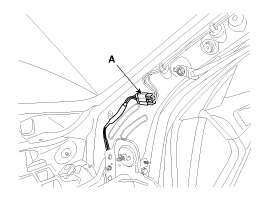
| 8. |
Disconnect the buzzer connector (A).
|
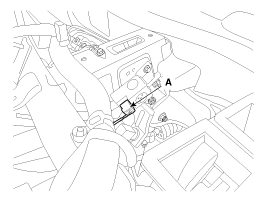
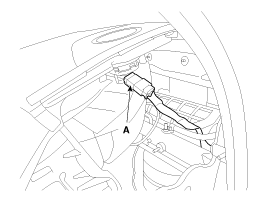
| 9. |
After loosening the mounting nut and screw, then remove the body control module (BCM) (A).
|
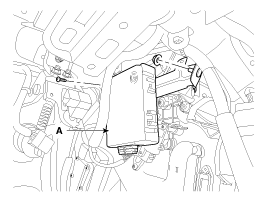
| 10. |
Disconnect the body control module (BCM) connectors (A).
|
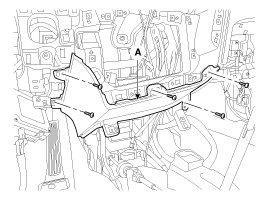
| 11. |
After loosening the mounting bolts and nuts, then remove the cowl cross bar assembly (A).
|

| 12. |
Installation is the reverse of removal.
|
 Crash Pad Components and Components Location
Components 1. Main crash pad assembly2. Side speaker grille [LH]3. Airbag blanking cover4. Side speaker grille [RH]5. Center speaker grille6. Crash pad side cover [LH]7. Side air vent duct [LH]8. Center ...
 Roof Trim Components and Components Location
Components 1. Roof trim2. Sunvisor3. Retainer4. Assist handle bracket Components [Panoramaroof] 1. Roof trim2. Sunvisor3. Retainer4. Assist handle bracket ...
Other information:
Kia Optima Hybrid (TF HEV) 2016-2020 Service Manual: Specifications
Specifications Fuel Delivery System ItemsSpecificationFuel TankCapacity65 lit. (17.2 U.S.gal., 68.7 U.S.qt., 57.2 Imp.qt.)Fuel FilterTypePaper typeFuel Pressure RegulatorRegulated Fuel Pressure333 ~ 353 kPa (3.4 ~ 3.6 kgf/cm?, 48.3 ~ 51.2 psi)Fuel PumpTypeElectrical, in-tank typeDriven byElectric motor ...
Kia Optima Hybrid (TF HEV) 2016-2020 Service Manual: Fuel Tank Air Filter Repair procedures
Removal 1. Turn the ignition switch OFF and disconnect the battery negative (-) cable. 2. Lift the vehicle. 3. Disconnect the canister close valve connector (A). 4. Disconnect the ventilation hose (B) from the fuel tank air filter and canister close valve. 5. Remove the fuel tank air filter assembly ...