Kia Optima Hybrid: Rear Glass Defogger / Rear Glass Defogger Switch Repair procedures
Kia Optima Hybrid (TF HEV) 2016-2020 Service Manual / Body Electrical System / Rear Glass Defogger / Rear Glass Defogger Switch Repair procedures
| Inspection |
| 1. |
The rear glass defogger switch inputs can be checked using the GDS. |
| 2. |
To check the input value of rear glass defogger switch, select option "Body Control Module". |
| 3. |
To consult the present input/output value of BCM, "Current
DATA". It provides information of BCM input/output conditions of smart
junction box.
|
| 4. |
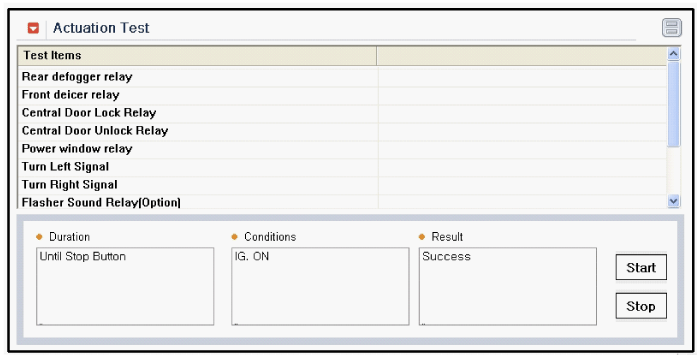
To check the input value of rear glass defogger switch in force mode, select option "Actuation Test of smart junction box".
|
| Removal |
| 1. |
Disconnect the negative (-) battery terminal. |
| 2. |
Remove the heater and A/C control unit.
(Refer to Heating, Ventilation, Air Condition - "Heater & A/C Control Untit (Manual))
(Refer to Heating, Ventilation, Air Condition - "Heater & A/C Control Untit (DATC)) |
| Installation |
| 1. |
Install the heater and A/C control unit. |
| 2. |
Connect the negative (-) battery terminal. |
 Rear Glass Defogger Printed Heater Repair procedures
Inspection Wrap tin foil around the end of the voltmeter test lead to prevent damaging the heater line. Apply finger pressure on the tin foil, moving the tin foil along the grid line to check ...
Other information:
Kia Optima Hybrid (TF HEV) 2016-2020 Service Manual: Oil Pump Components and Components Location
Component 1. Flange bolt2. Sleeve3. Reaction shaft support assembly4. Driven gear 5. Sleeve6. Driven gear 7. Oil pump housing ...
Kia Optima Hybrid (TF HEV) 2016-2020 Service Manual: Fuel Filler Door Release Actuator Repair procedures
Inspection 1. Remove the trunk room left side trim. (Refer to the BD group - "Interior trim") 2. Remove the fuel filler door release actuator (A) after loosening the mounting bolts. 3. Disconnect the release actuator connector (A). 4. Check for continuity between terminal No.1 and No.2. If there is no ...
© 2025 Copyright www.koptimatfhev.com


